Crochet Flower Bouquet: How to Make One Step by Step
Make a crochet flower bouquet that never wilts: easy tulip and lavender patterns, how to add roses, daisies and leaves, how to build wire stems, and how to arrange and wrap it like a florist.
By AlixaPublished 11 min read
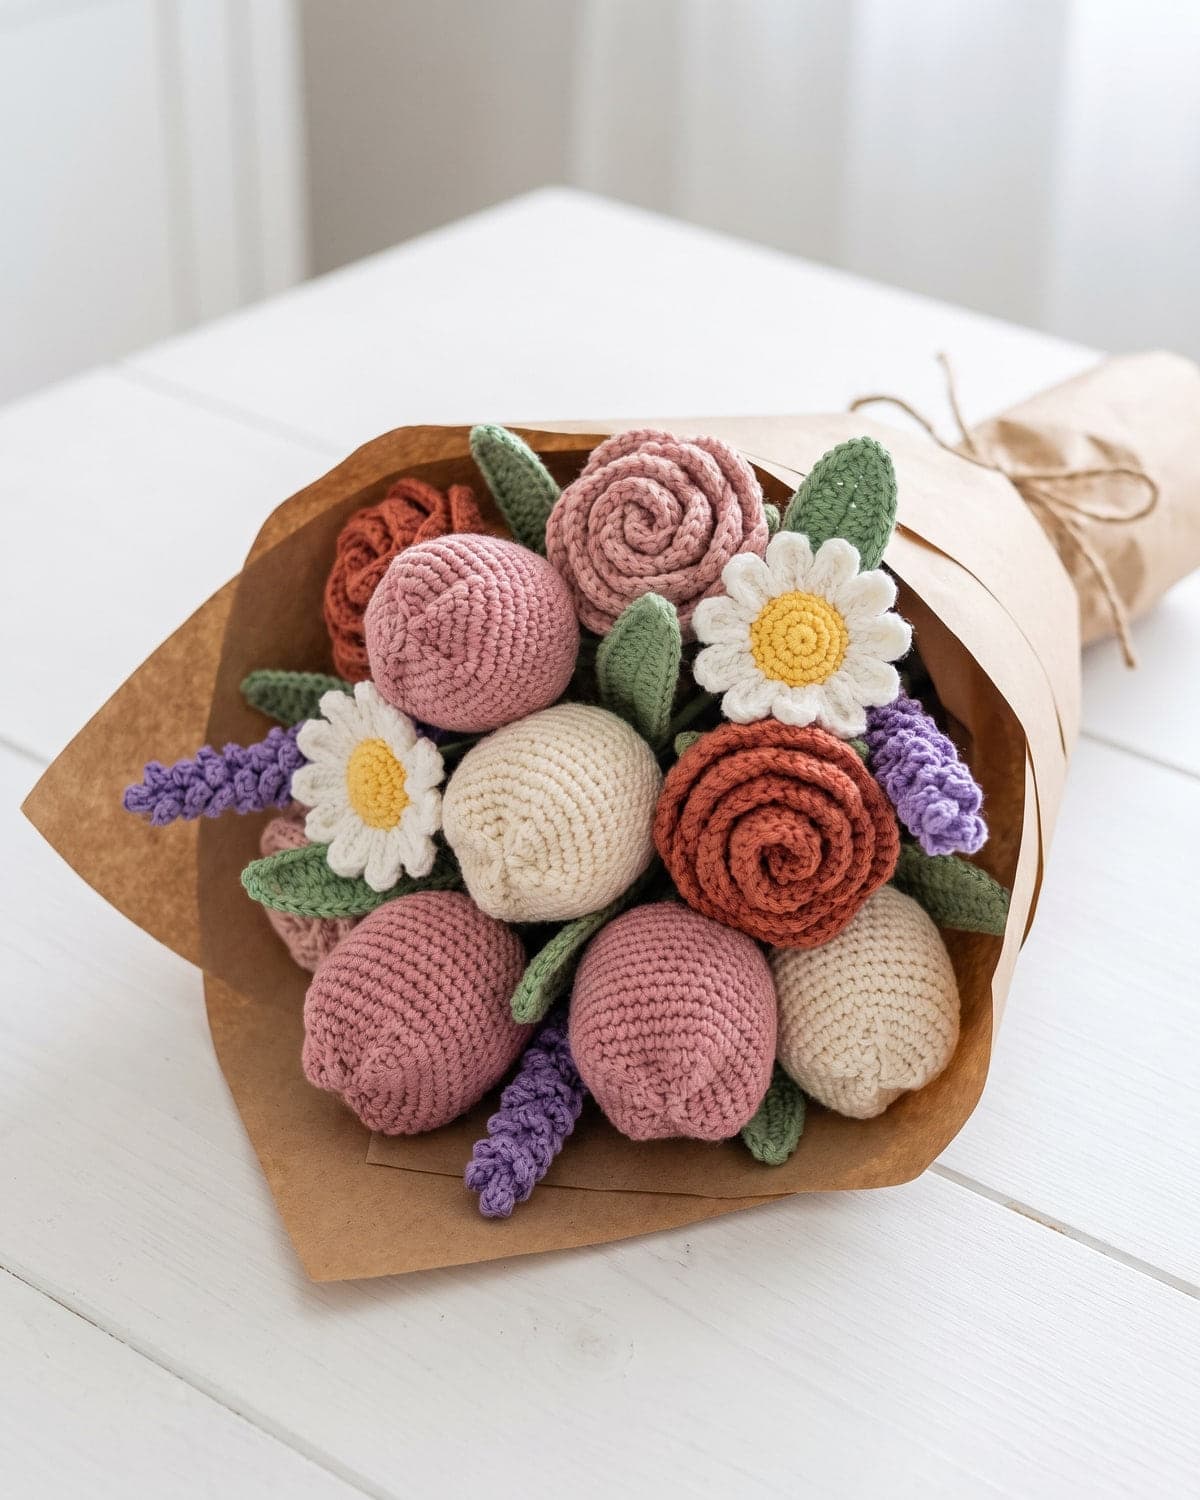
A crochet flower bouquet never wilts, doesn't need water, and can be made in exactly the colours someone loves. It's one of the most popular handmade gifts for Mother's Day, birthdays, weddings and graduations, and it's far more achievable than it looks. A bouquet is a handful of small, simple pieces, wired and wrapped.
This guide shows you how to make a complete crochet bouquet: two new flower patterns (a tulip and a sprig of lavender), how to add the roses, daisies and leaves from our earlier tutorial, how to build stems that hold their shape, and how to arrange and wrap everything so it looks like it came from a florist.
Terms used here: US crochet terms. In UK terms, single crochet (sc) is double crochet, half double (hdc) is half treble, and double crochet (dc) is treble.
About these patterns: the tulip and lavender are simple designs written for this guide. The stitch counts have been checked so every round adds up. Sizes are approximate, because they depend on your yarn and hook.
What you need
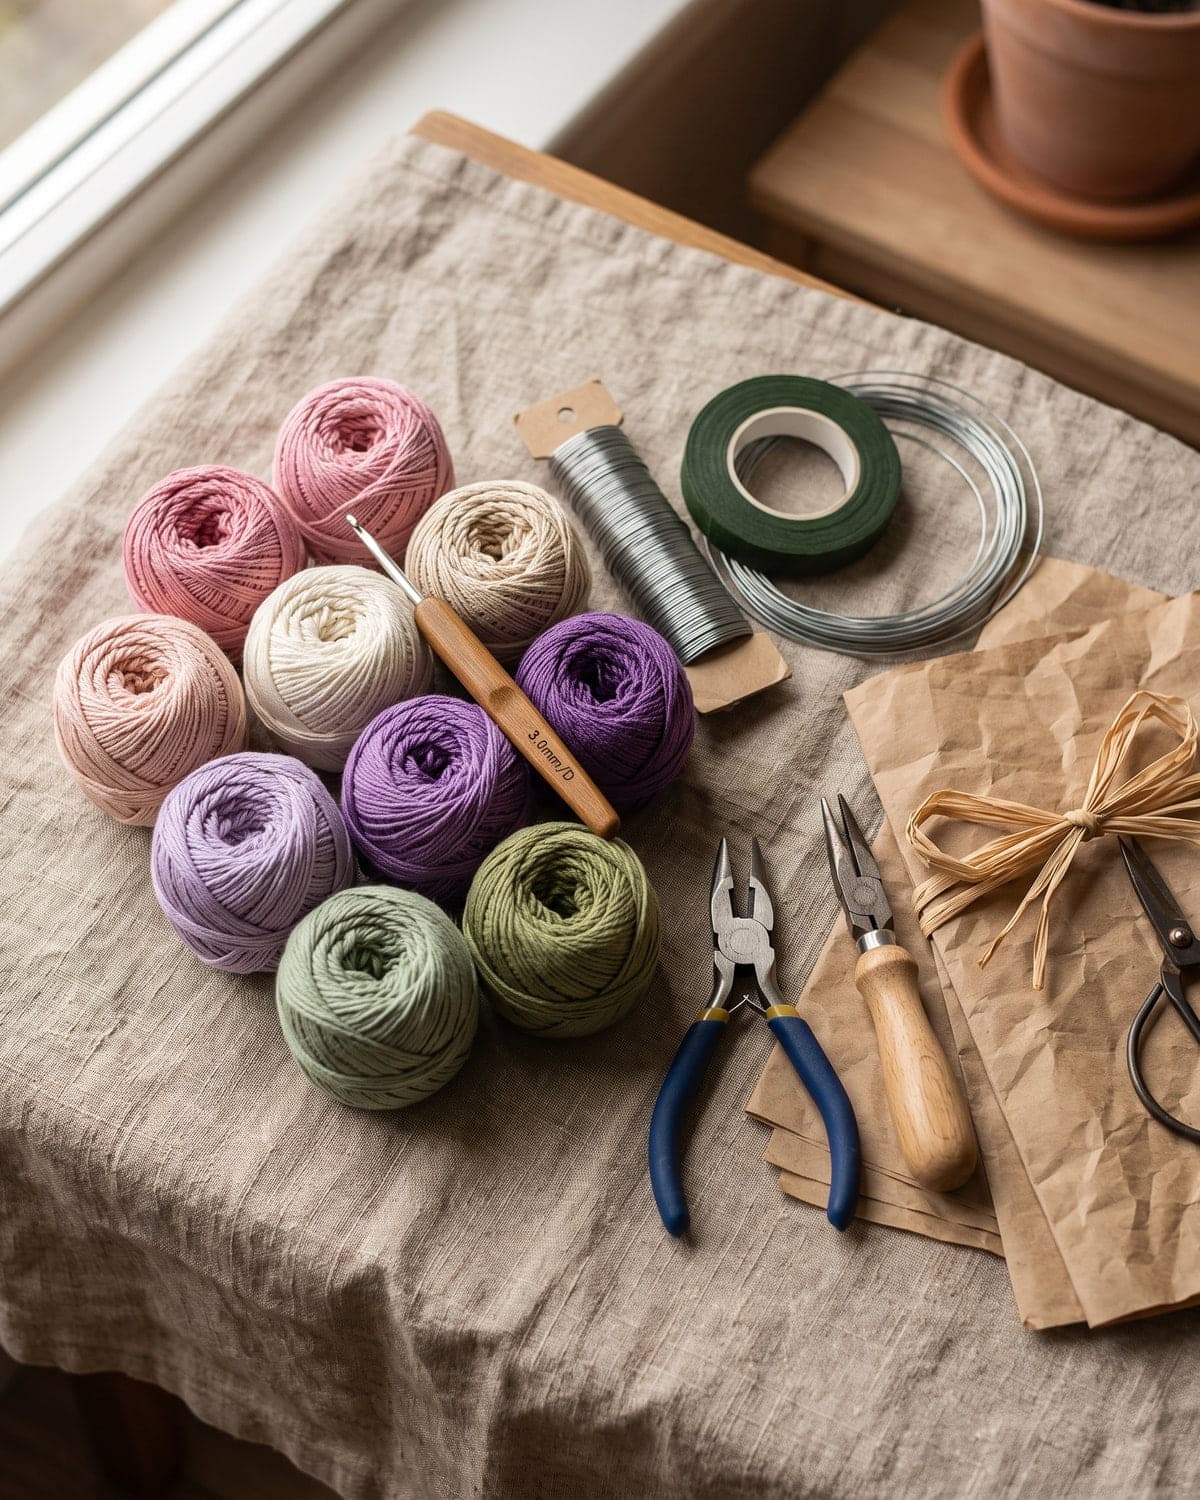 For the flowers
- Cotton yarn in DK or worsted weight (weight 3 or 4), in two or three flower colours plus green. Cotton holds its shape and gives clear stitches. Each flower uses only a few metres, so small balls or leftovers are fine.
- A hook one or two sizes smaller than the label suggests, for firm petals: 3 mm or 3.5 mm (US D-3 or E-4) for DK cotton.
- A little fibrefill stuffing for the tulips.
- A tapestry needle, scissors and a stitch marker.
For the stems and wrapping
- Stems: floral wire (18 to 20 gauge is sturdy enough), or thin wooden skewers.
- Green floral tape, or green yarn and craft glue, to cover the stems.
- Wire cutters and small pliers if you're using wire.
- A hot glue gun or strong craft glue.
- Wrapping: kraft paper, tissue paper or a square of fabric, and twine or ribbon.
Safety: wire ends are sharp, and hot glue burns. A wired bouquet is a decoration for adults and older children, not a toy for little ones.
Planning your bouquet
A little planning saves yarn and makes the finished bouquet look deliberate.
- Choose a palette of three flower colours and one green. For example dusty pink, cream and terracotta with sage green.
- Mix shapes. Combine round flowers (roses), flat flowers (daisies), cup shapes (tulips) and tall, thin stems (lavender). Variety in shape matters more than variety in colour.
- Use odd numbers. Three, five or seven main flowers look more natural than four or six.
- Add filler. Lavender sprigs and extra leaves fill gaps and make a bouquet look generous.
A good first bouquet: three tulips, two roses, two daisies, three lavender sprigs and five leaves. That's ten stems.
Pattern 1: Crochet tulip
The tulip is a small cup worked in a spiral, finished with three pointed petals. It's worked in continuous rounds without joining, so mark the first stitch of each round.
Skills used: magic ring, single crochet in a spiral, increasing. If those are new, amigurumi for beginners explains them step by step.
- Round 1: 6 sc in a magic ring (6)
- Round 2: 2 sc in each stitch around (12)
- Round 3: (sc in the next 3 stitches, 2 sc in the next stitch) 3 times (15)
- Rounds 4 to 8: sc in each stitch around, for 5 rounds (15)
- Round 9 (petal points): *sc in the next stitch, hdc in the next stitch, (dc, ch 2, slip stitch in the 2nd chain from the hook, dc) all in the next stitch, hdc in the next stitch, sc in the next stitch; repeat from * 2 more times. Slip stitch in the next stitch and fasten off.
Each petal point uses five stitches, so three points use all fifteen. The little chain-and-slip-stitch in the middle of each one makes the tip.
Weave the end down inside the cup. Stuff the tulip lightly, just enough to hold its rounded shape.
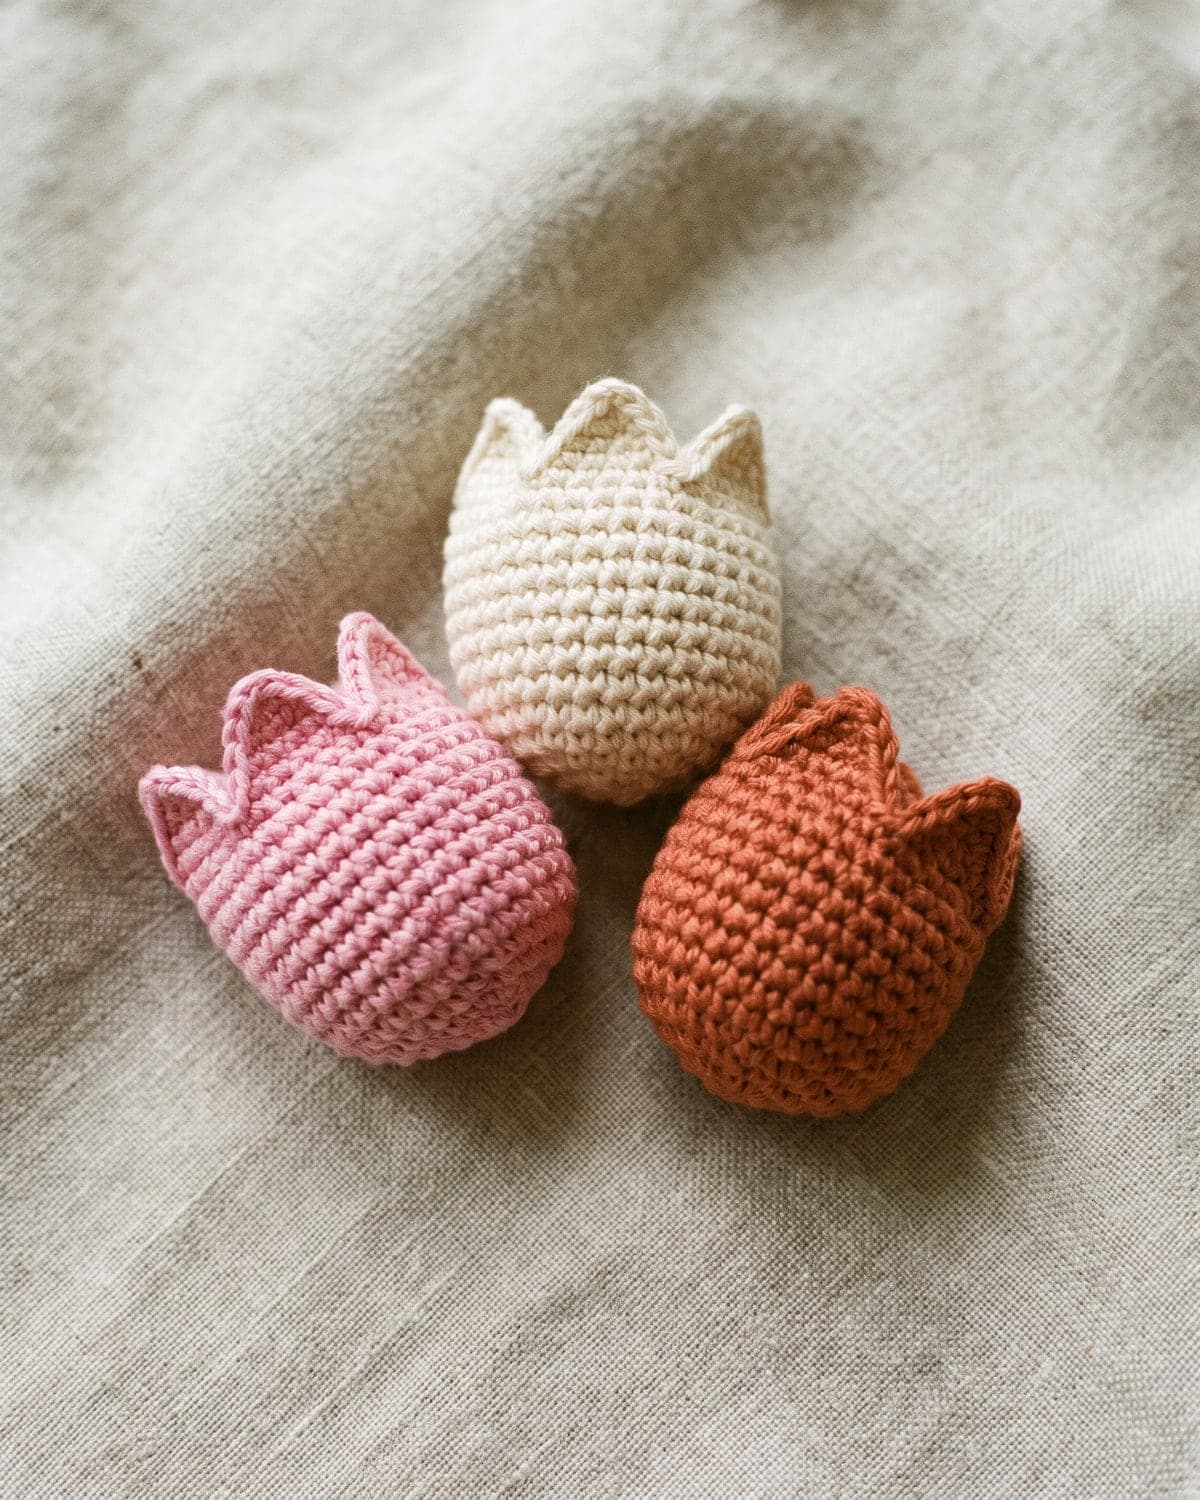 To make a closed bud, thread a length of matching yarn through the three petal tips and draw them gently together.
To make a larger tulip, add a fourth round of increases, (sc in the next 4 stitches, 2 sc in the next stitch) 3 times (18), work six plain rounds, and work Round 9 with one extra single crochet at the start of each repeat.
Pattern 2: Lavender sprig
Lavender is the easiest filler flower there is: a strip of tiny loops, wound around the top of a stem.
With purple yarn, chain 21.
Starting in the 2nd chain from the hook: *(slip stitch, chain 3, slip stitch) all in the next chain, then slip stitch in the next chain; repeat from * to the end of the chain. You'll have ten little loops along the strip.
Fasten off, leaving a 20 cm (8 in) tail.
To assemble: put a dot of glue at the tip of a stem. Starting there, wind the strip around the stem in a downward spiral, so the loops overlap slightly, gluing as you go. Wrap the tail tightly around the bottom of the flower and glue it down.
For a longer flower head, start with 31 chains.
Roses, daisies and leaves
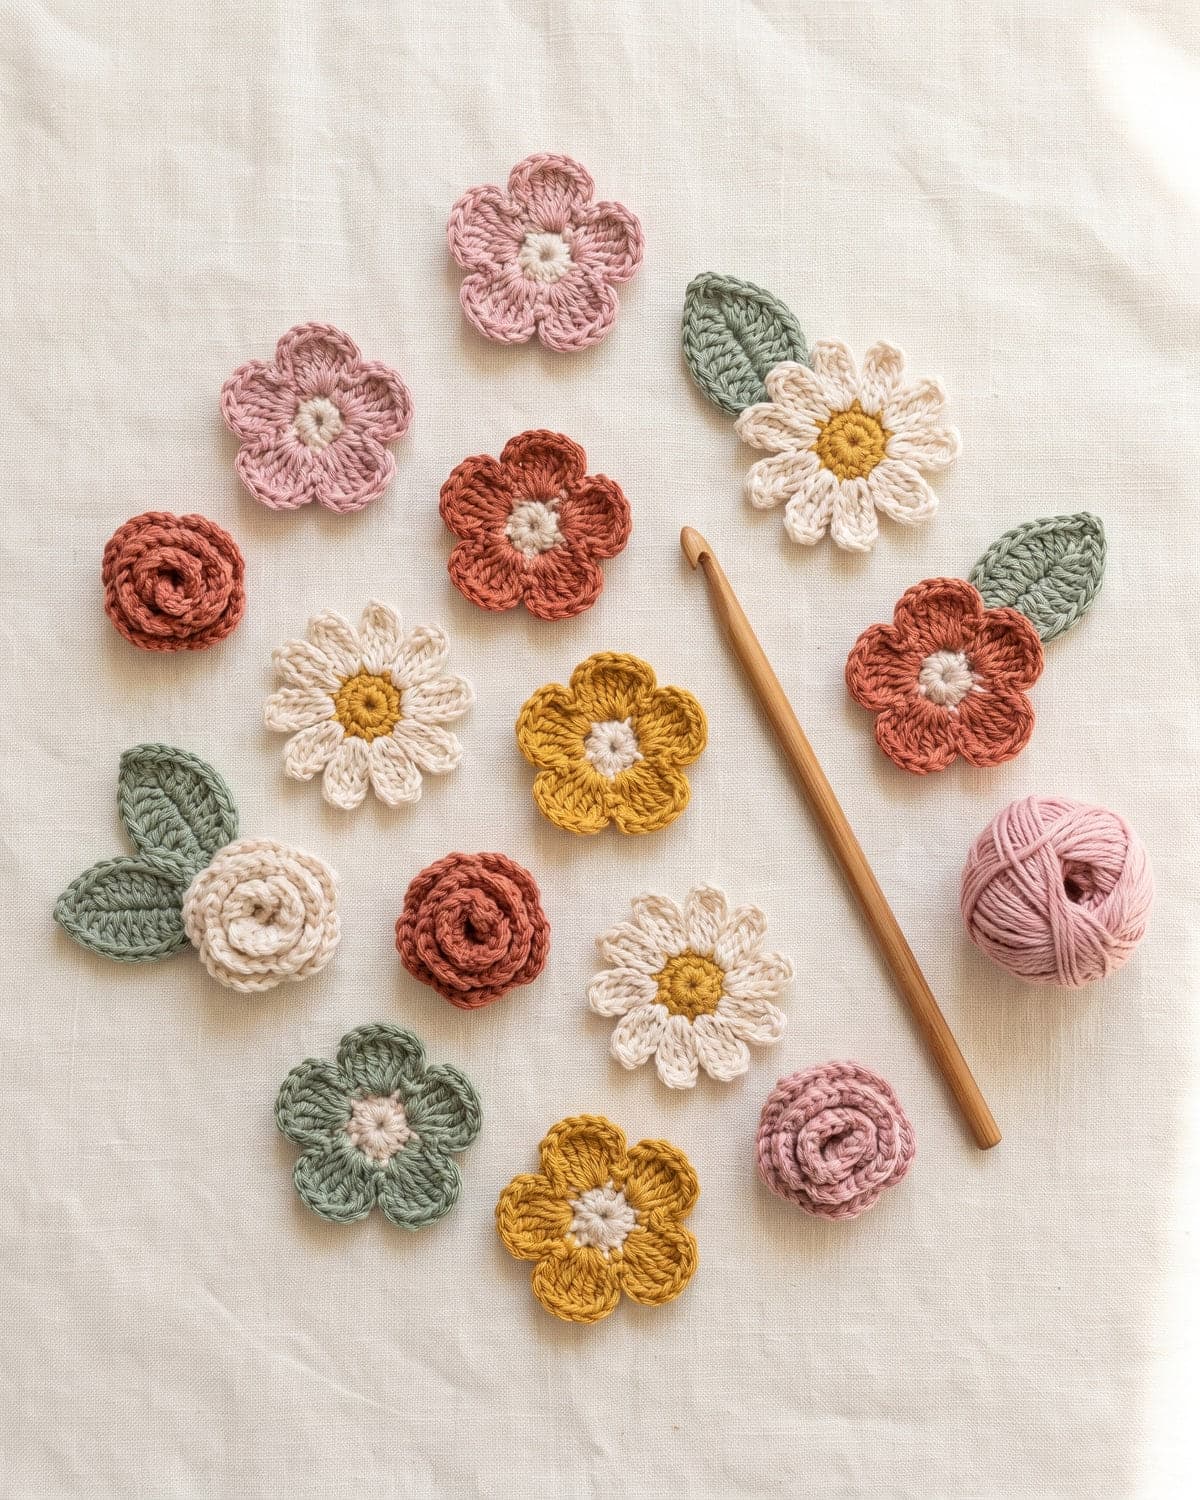
The other flowers in the bouquet come from easy crochet flowers, which has four short patterns:
- Rolled rose: a strip of scalloped petals rolled up and stitched at the base. Make them in two sizes by changing the length of the starting chain.
- Daisy: a round yellow centre with twelve white chain petals.
- Five-petal flower: a quick flat flower that works well as a small filler bloom.
- Leaf: worked around both sides of a short chain. Make at least five. More is better.
For a bouquet, leave a long yarn tail on every piece. You'll use it to attach the piece to its stem.
A long tulip leaf
Tulips have long, narrow leaves. With green yarn, chain 21. Working back along the chain: sc in the 2nd chain from the hook, hdc in the next 2 chains, dc in the next 12 chains, hdc in the next 2 chains, sc in the next 2 chains, and 3 sc in the last chain to turn the tip. Then work back along the other side of the chain: sc in the next 2 chains, hdc in the next 2, dc in the next 12, hdc in the next 2, sc in the last. Join with a slip stitch to the first stitch and fasten off with a long tail.
How to make the stems
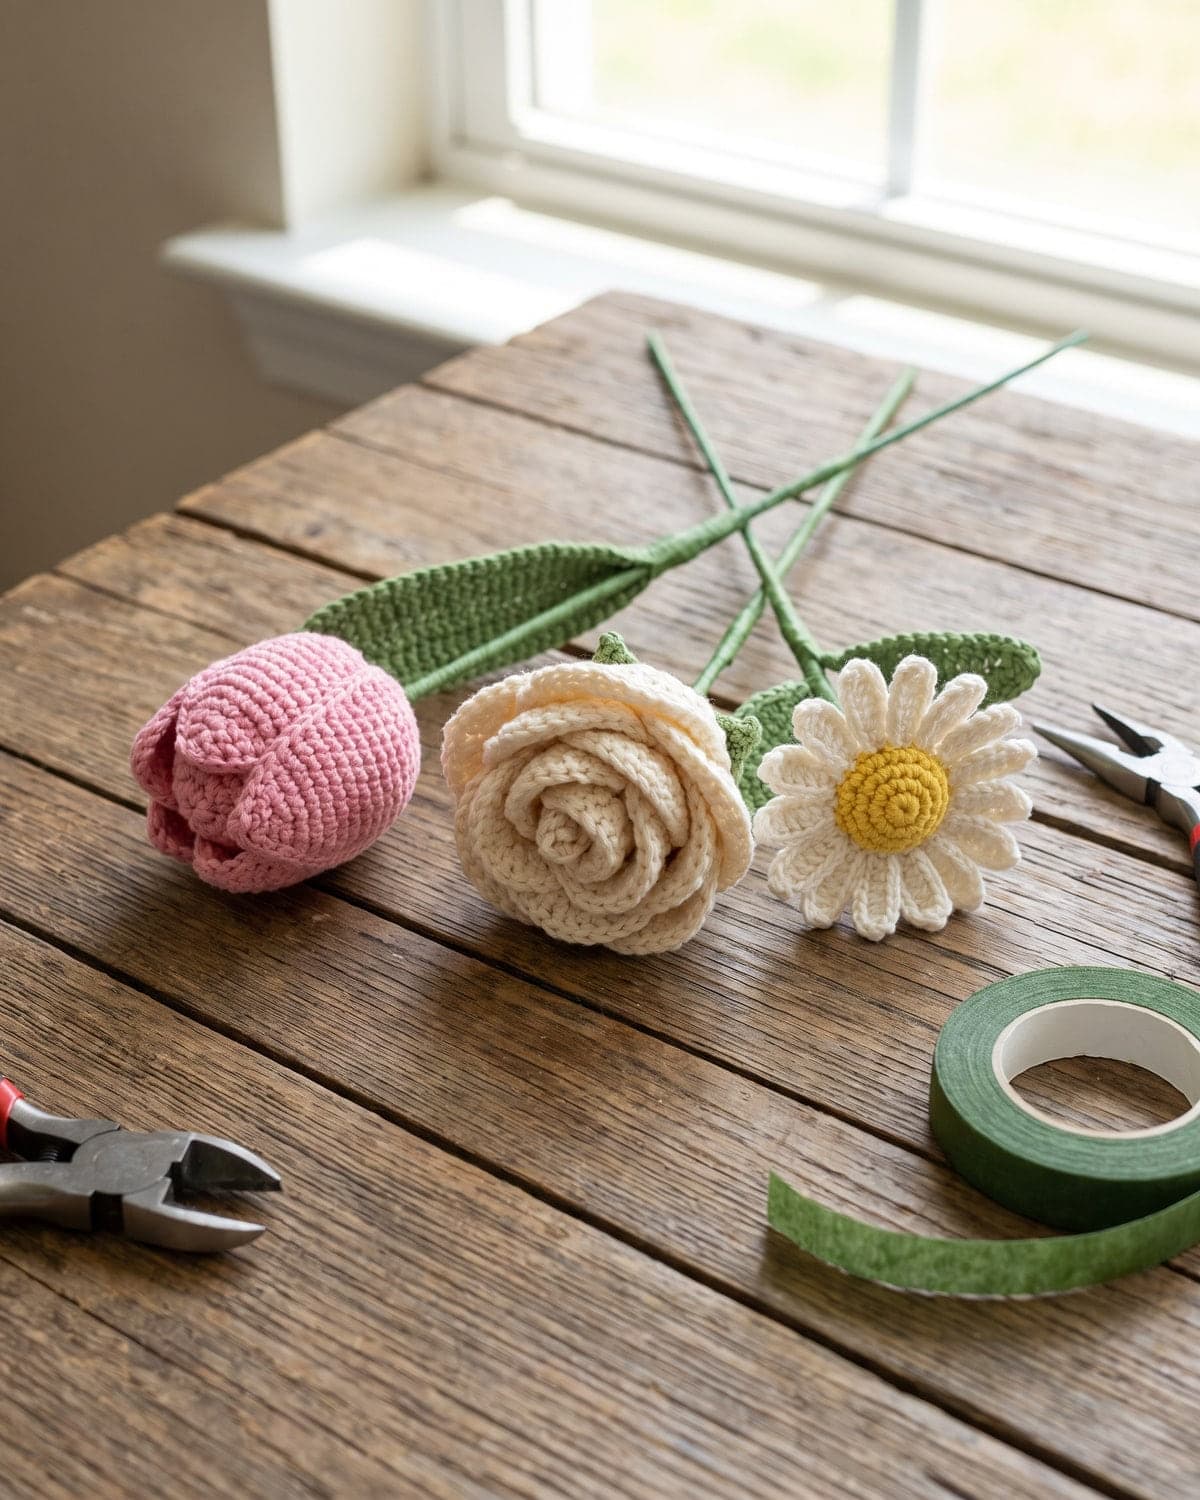
1. Prepare the wire or skewer
Cut each stem about 25 to 30 cm (10 to 12 in) long. With pliers, bend the top centimetre of each wire into a small closed loop. The loop stops the flower sliding down and keeps the sharp end tucked away. If you're using skewers, cut off the pointed tip.
2. Attach the flower
- Tulip: push the looped end of the wire up through the centre of the magic ring from below, into the stuffing. Add a dot of glue where the stem enters.
- Rose: push the wire up into the centre of the rolled base and glue.
- Daisy or five-petal flower: flat flowers need a small base. With green yarn, work 6 sc in a magic ring, then one round of 2 sc in each stitch (12). Push the wire through the middle of this disc, glue the disc to the back of the flower, and you have a neat green calyx.
- Lavender: wound directly onto the stem, as described above.
Let the glue set completely before wrapping.
3. Cover the stem
With floral tape: start just under the flower. Stretch the tape slightly as you wrap, because stretching is what makes it sticky, and spiral downwards with each turn overlapping the last by half.
With yarn: put a little glue at the top of the stem, lay the end of the green yarn in it, and wrap tightly down the stem with the turns side by side. Add a dot of glue every few centimetres and at the bottom.
With a crocheted cover: chain a length as long as the stem, work one row of single crochet along it, wrap it around the stem and sew the long edges together. This is the softest finish, and the slowest.
4. Add the leaves
Hold the base of a leaf against the stem, about a third of the way down, and wrap the tape or yarn over the leaf's tail to catch it in. Tulip leaves sit low on the stem. Rose leaves sit higher, in pairs.
Arranging the bouquet
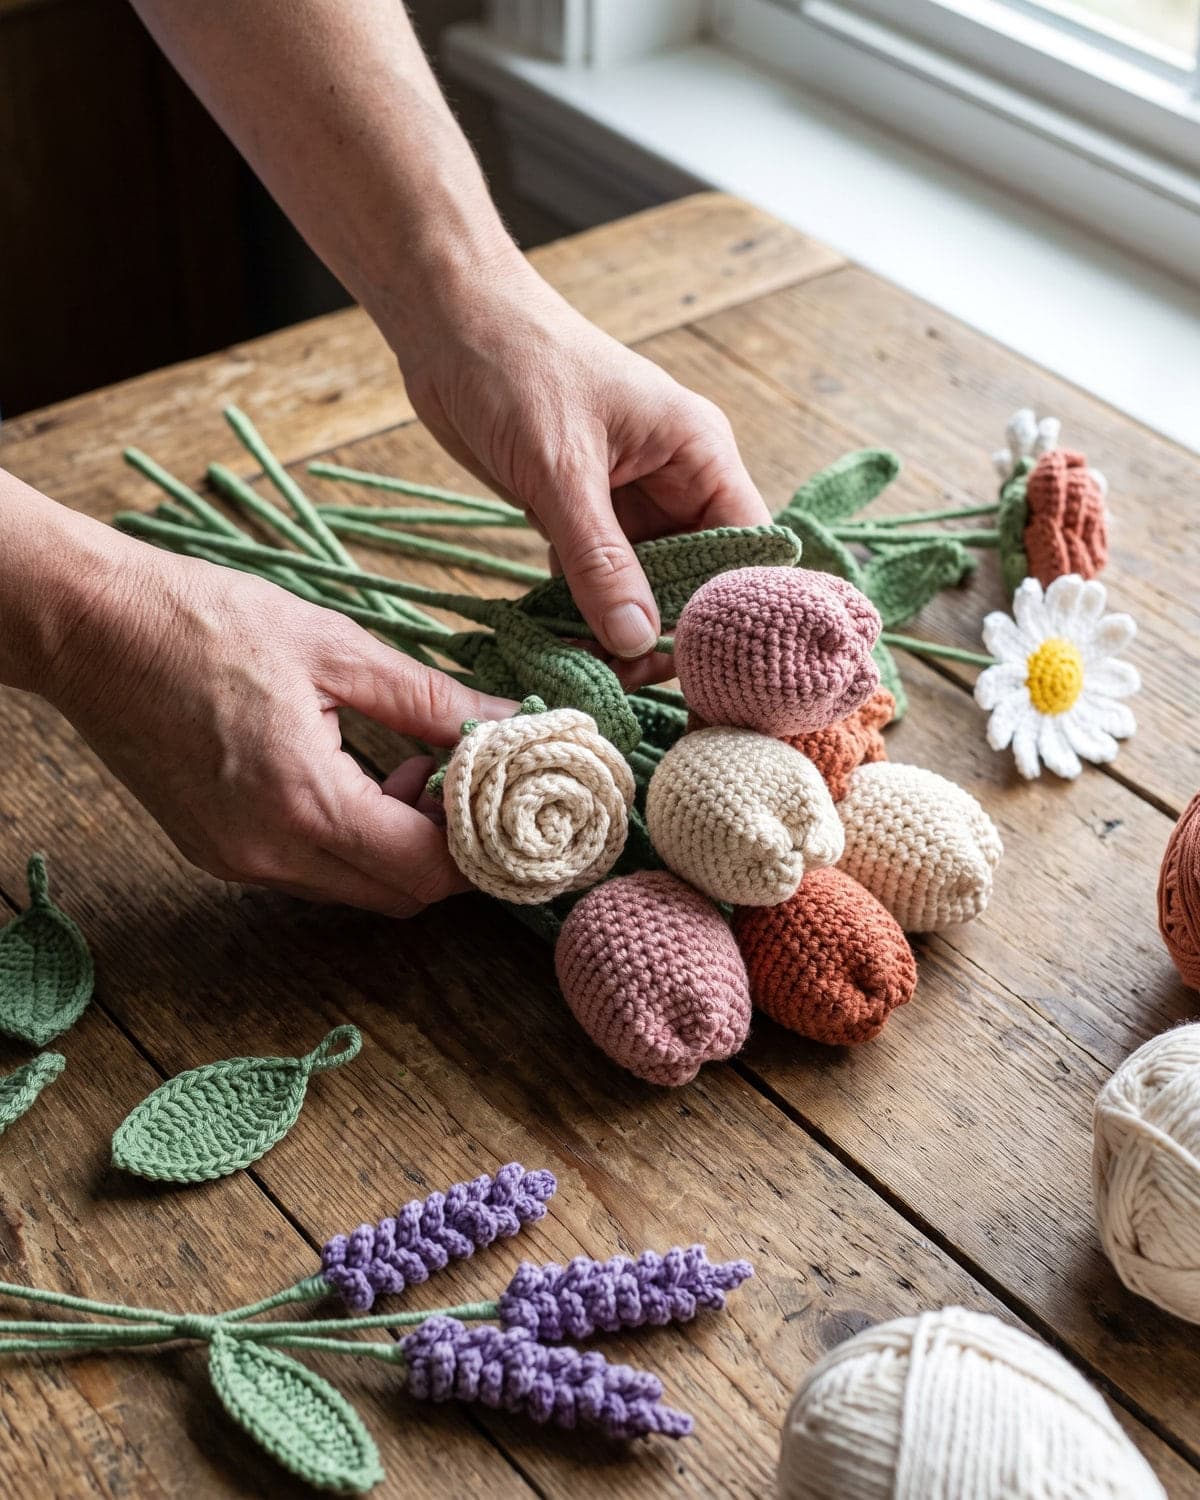
- Start with the largest flower in the centre. Hold it in one hand.
- Add the other main flowers around it, turning the bunch a little each time. Put the stems in at a slight angle, so the flowers fan outwards in a dome.
- Stagger the heights. Bend or trim the stems so the central flowers sit a little higher than the outer ones.
- Tuck filler into the gaps. Lavender and extra leaves go between and behind the main flowers.
- Frame with leaves around the outer edge.
- Check it from the front and from above. Wire stems can be bent to turn a flower's face forward.
- Bind the stems tightly with floral tape or twine, about halfway down.
- Trim the ends so they're level.
How to wrap a crochet bouquet
- Cut a square of kraft paper about 40 cm (16 in) across. For a layered look, lay a sheet of tissue paper on top, turned so its corners sit between the corners of the kraft paper.
- Lay the bouquet diagonally on the paper, with the flower heads just above one corner.
- Fold the bottom corner up over the stems.
- Fold one side across the bouquet, then the other, so the paper forms a cone.
- Tie twine or ribbon firmly around the narrowest part, and finish with a bow.
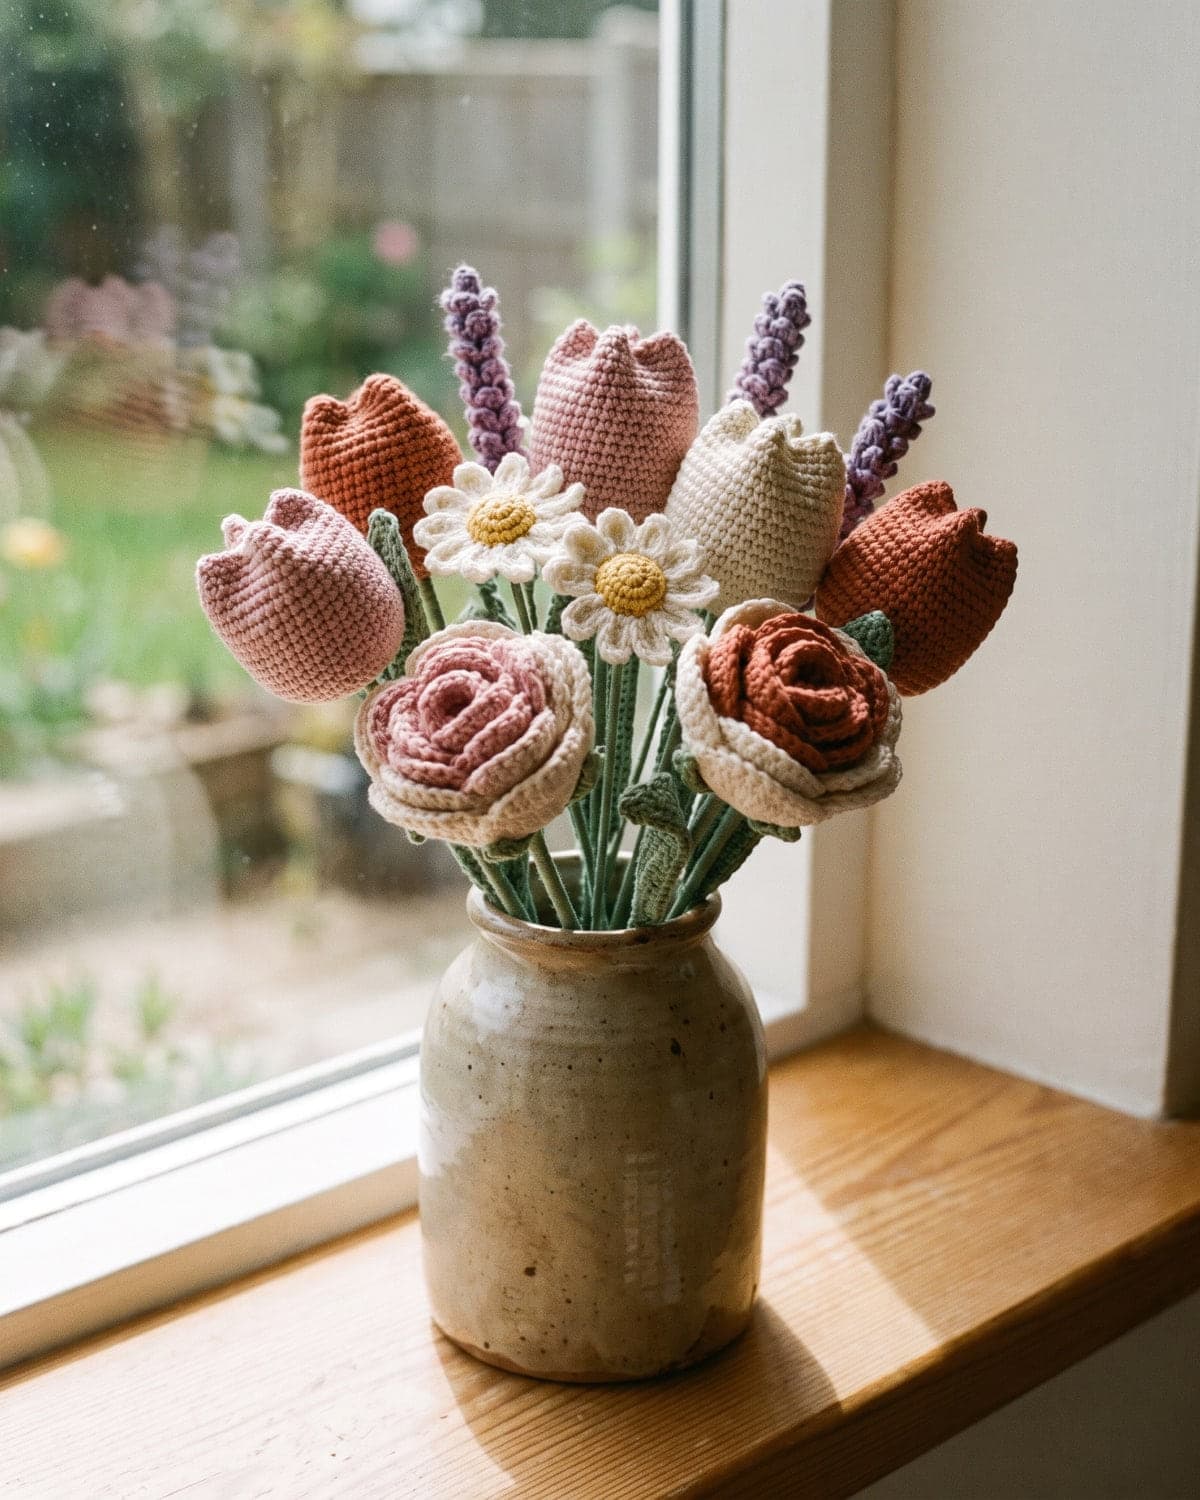
For a gift, add a tag, or tuck a small crochet heart or butterfly into the bow. The bouquet can also stand in a vase without any wrapping. Put a little dry rice or sand in the bottom of the vase to hold the stems in place.
Bouquet ideas for different occasions
- Mother's Day: tulips and roses in pink and cream, with lavender.
- Wedding or anniversary: all white and cream roses with sage green leaves. A crochet bridal bouquet becomes a keepsake.
- Birthday: the brightest colours you have, with daisies as filler.
- Graduation: flowers in school or university colours.
- Get well soon: a small posy of three flowers. It's allowed where fresh flowers sometimes aren't, but check the hospital's rules first.
- Teacher gift: a single wrapped tulip or rose is quick to make and always appreciated.
- Valentine's Day: red roses, of course. A single long-stemmed rose with two leaves is the classic.
Common problems and fixes
The flower heads droop. The wire is too thin for the weight of the flower. Use a lower gauge number (thicker wire), double the wire, or shorten the stem.
The flowers spin on their stems. Use more glue where the stem meets the flower, and make sure the wire has a loop at the top.
The tulip won't hold its cup shape. Use a smaller hook for tighter stitches, and add a little more stuffing.
The petal tips curl inwards. Pinch each point between your fingers and steam it lightly above a kettle or iron, without touching the heat.
The floral tape won't stick. Stretch it as you wrap. It only becomes tacky when it's pulled.
The yarn wrap slides down the stem. Add glue at the top and at intervals, and wrap more tightly.
The bouquet looks sparse. Add leaves and lavender. Filler is what makes a bouquet look full.
The bouquet looks flat. Vary the stem heights and angle the outer stems outwards.
Caring for a crochet bouquet
- Dust it now and then with a hairdryer on a cool, low setting, or a soft brush.
- Keep it out of direct sunlight, which fades cotton over time.
- Keep it dry. Wire can rust and glue can loosen if the bouquet gets wet.
- Reshape bent stems and flattened petals with your fingers.
Frequently asked questions
How long does it take to crochet a flower bouquet? It depends on the number of stems and your speed. Each flower is quick, but assembling stems takes time. A ten-stem bouquet is a comfortable weekend project.
What yarn is best for crochet flowers? Cotton or a cotton blend in DK or worsted weight. It gives firm, well-defined petals.
What can I use for stems? Floral wire is the most flexible. Wooden skewers, thick craft wire and even green pipe cleaners also work.
How many flowers do I need for a bouquet? Five to seven main flowers plus filler and leaves makes a medium bouquet. Three flowers make a small posy.
Is a crochet bouquet a good beginner project? The individual flowers are beginner-friendly. If you can work in the round and make a double crochet, you can make this.
Can I sell bouquets made from these patterns? Yes. You're welcome to sell what you make.
More flowers and gifts
A crochet bouquet is a set of small skills you can use everywhere: flowers for appliqués, stems for single gift roses, and wrapping for any handmade present.
- Start with the four basic patterns in easy crochet flowers.
- Learn the magic ring and spiral rounds in amigurumi for beginners.
- Pair a small posy with a set of easy crochet coasters for a complete handmade gift.
You'll find more patterns in the flowers section, and ideas for holidays in seasonal.
Save it for later
Pin this to your Pinterest board so it's there when you're ready to stitch.
Keep stitching
Related crochet projects
Flowers Easy Crochet Flowers: 4 Simple Patterns for Beginners
11 min read
Seasonal Crochet Christmas Ornaments: 4 Easy Patterns for Beginners
12 min read
Home decor Easy Crochet Coasters: Round and Square Patterns for Beginners
10 min read
Amigurumi Amigurumi for Beginners: How to Crochet Your First Animal
10 min read