Amigurumi for Beginners: How to Crochet Your First Animal
Learn amigurumi step by step: the magic ring, working in a spiral, increasing, the invisible decrease and stuffing, with a practice ball and a simple first bear pattern.
By AlixaPublished 10 min read
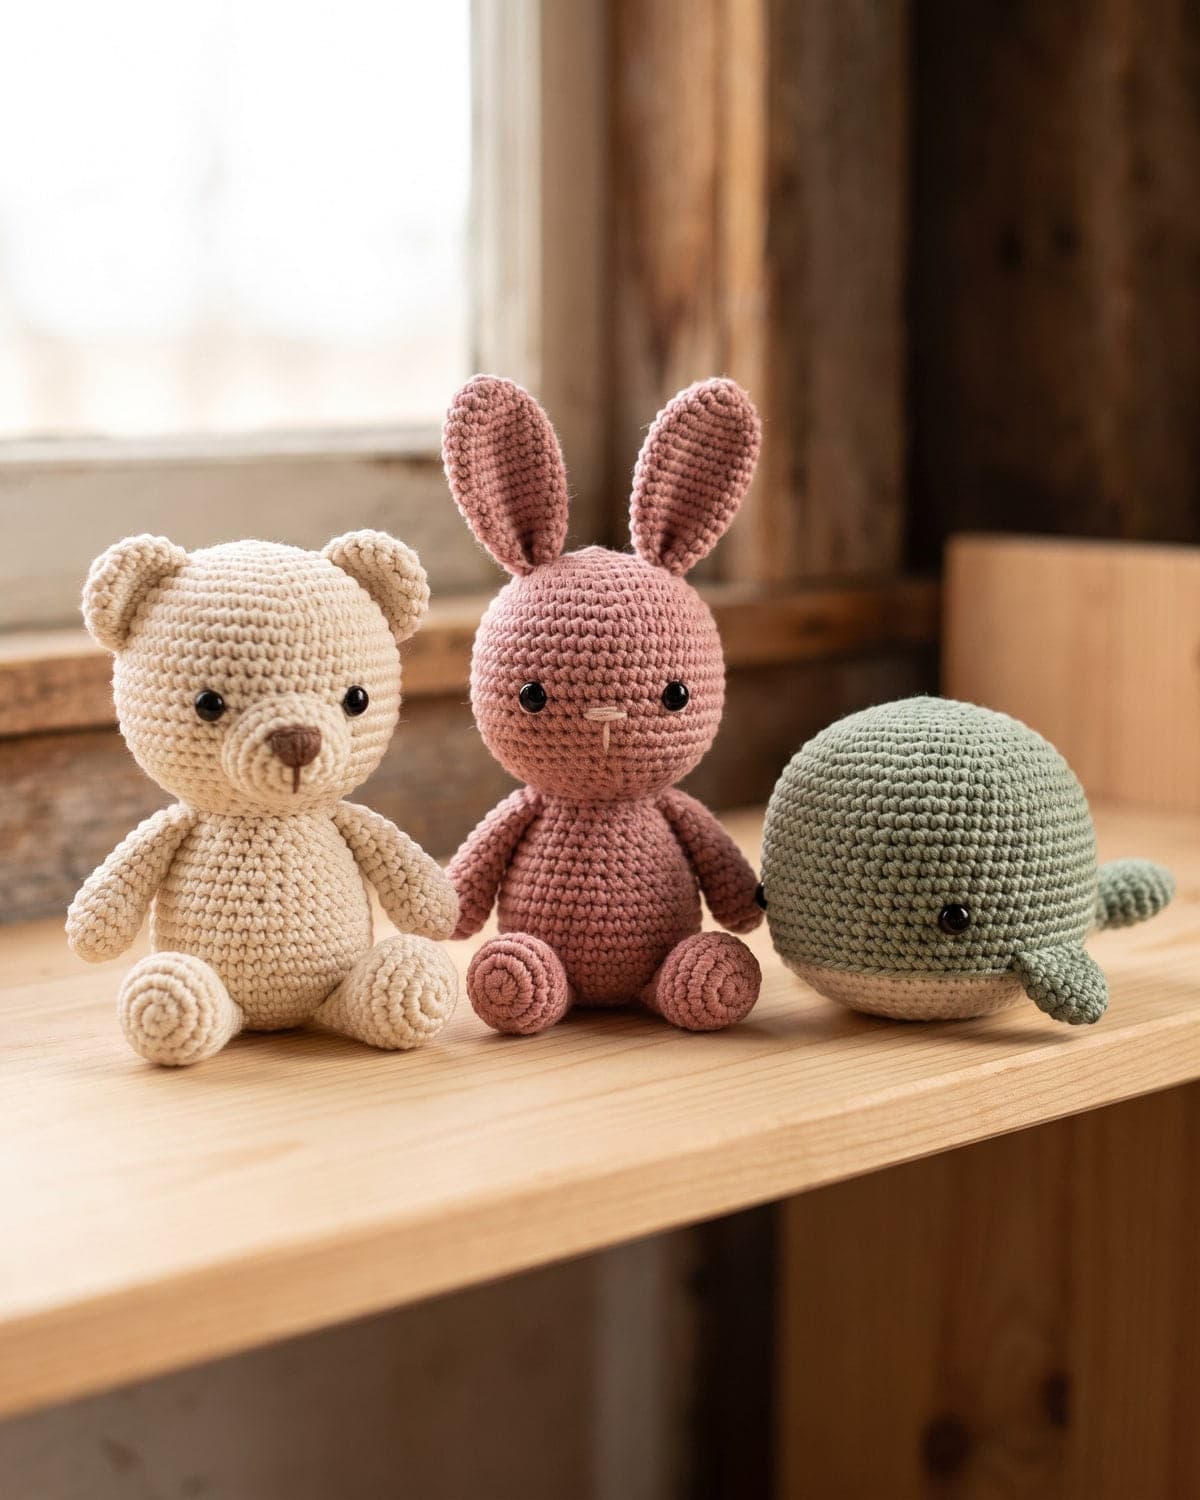
Amigurumi is the craft of crocheting small stuffed toys: animals, dolls, food with faces, anything round and friendly. The word comes from Japanese, and the style is recognisable straight away: tight stitches, simple shapes and a lot of charm.
It looks intricate, but amigurumi uses very few techniques. Nearly everything is single crochet worked in a spiral, with stitches added to make a piece wider and removed to make it narrower. This guide teaches those techniques in order, then puts them together in a practice ball and a simple first bear.
Terms used here: US crochet terms. Single crochet (sc) is called double crochet (dc) in UK terms.
About the patterns: the ball and bear are basic practice designs written for this guide. Each round's stitch count has been checked so the numbers add up. Finished sizes are approximate, because they depend on your yarn, hook and how firmly you stuff.
What you need
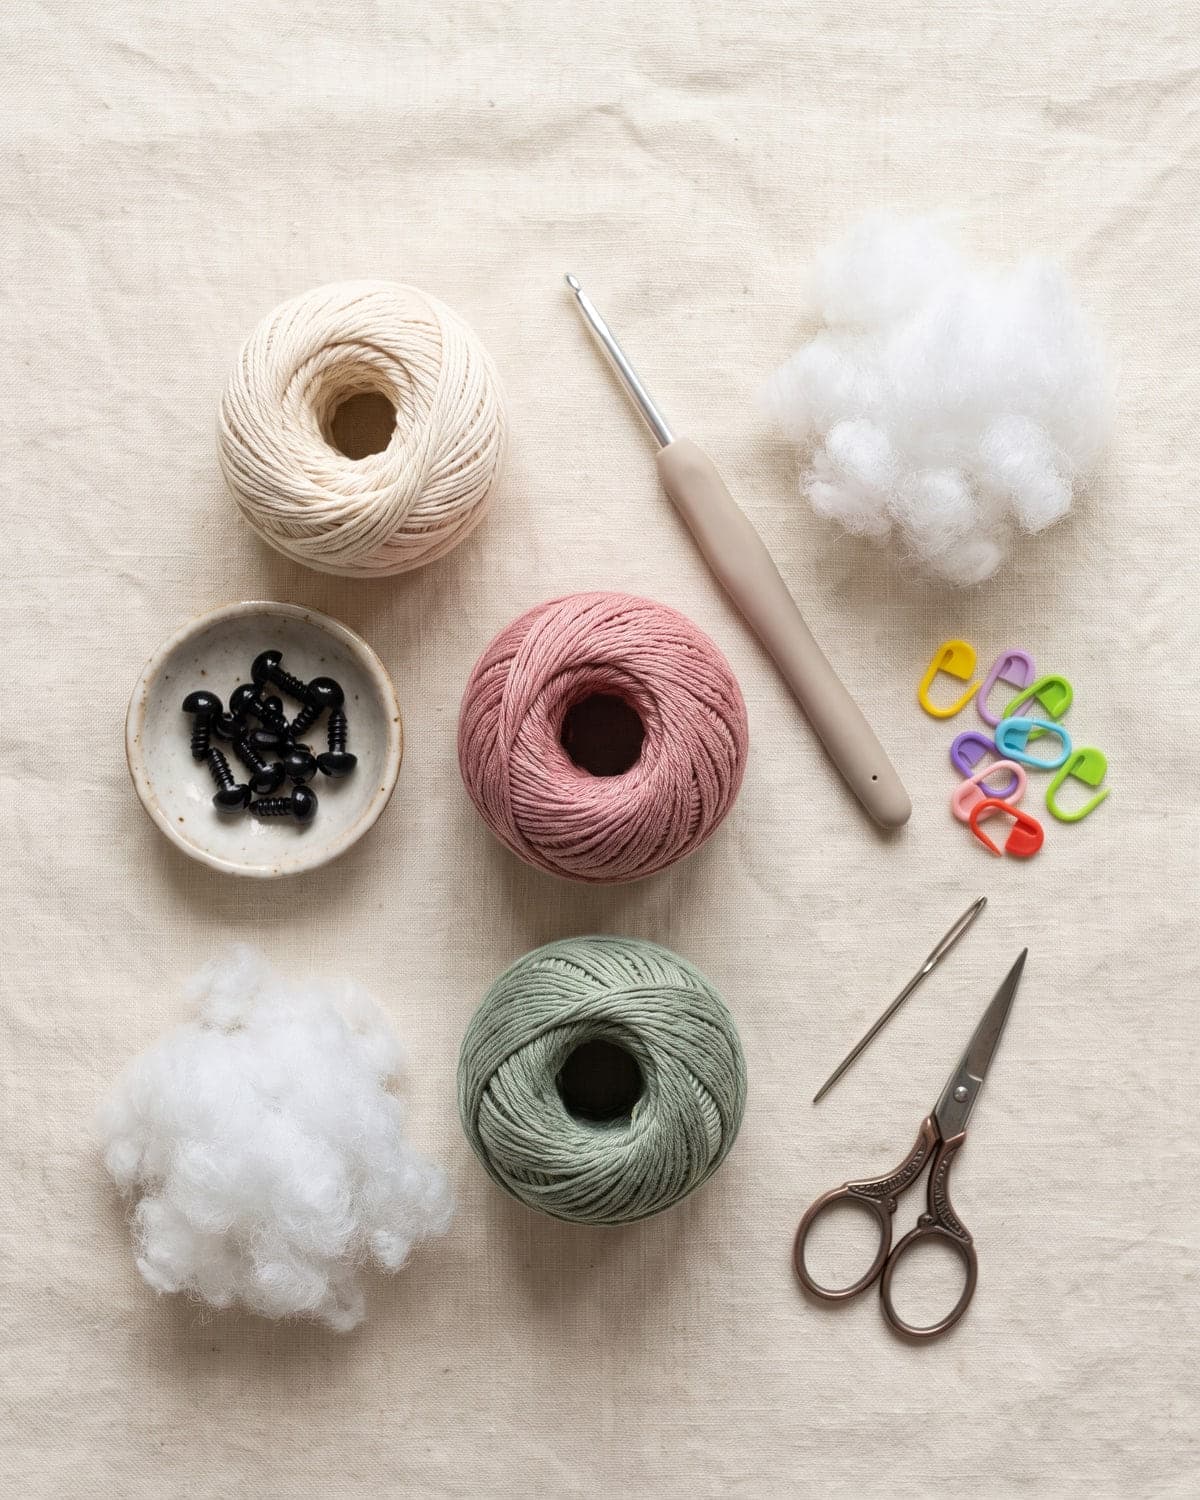
- Yarn. Smooth cotton or acrylic in DK or worsted weight (weight 3 or 4). Cotton gives very clear stitches. Choose a light colour for your first toy so you can see where the hook goes.
- A small hook. Go two or three sizes below the yarn label's suggestion: about 2.5 to 3 mm for DK, 3.5 mm for worsted. The fabric must be tight enough that stuffing doesn't show through.
- Polyester fibrefill stuffing.
- Locking stitch markers. In spiral rounds there's no visible start, so a marker is essential.
- Safety eyes (6 to 8 mm for small toys), or black yarn or embroidery thread to stitch eyes instead.
- A tapestry needle, scissors and a few pins.
Safety first: toys for babies and young children
Plastic safety eyes are held on by a washer inside the toy, but they are still small parts and can come off, especially if the fabric is loose or gets chewed. For any toy that might be given to a baby or a child under three, embroider the eyes and nose with yarn and leave off buttons, beads and loose ribbons. The US Consumer Product Safety Commission's guidance on small parts explains the general rule for toys. Sew every part on firmly and check the toy from time to time.
The five techniques behind every amigurumi
1. The magic ring
The magic ring starts a round with no hole in the middle.
- Wrap the yarn around two fingers to form a loop, with the working yarn crossing over the tail.
- Insert the hook through the loop, catch the working yarn and pull up a loop.
- Chain 1 to lock it.
- Work your stitches into the ring, crocheting over both the loop and the tail.
- Pull the tail firmly to close the centre.
Can't get on with it? Chain 2 and work the first round into the first chain you made. The hole will be slightly bigger, but it works.
2. Working in a spiral
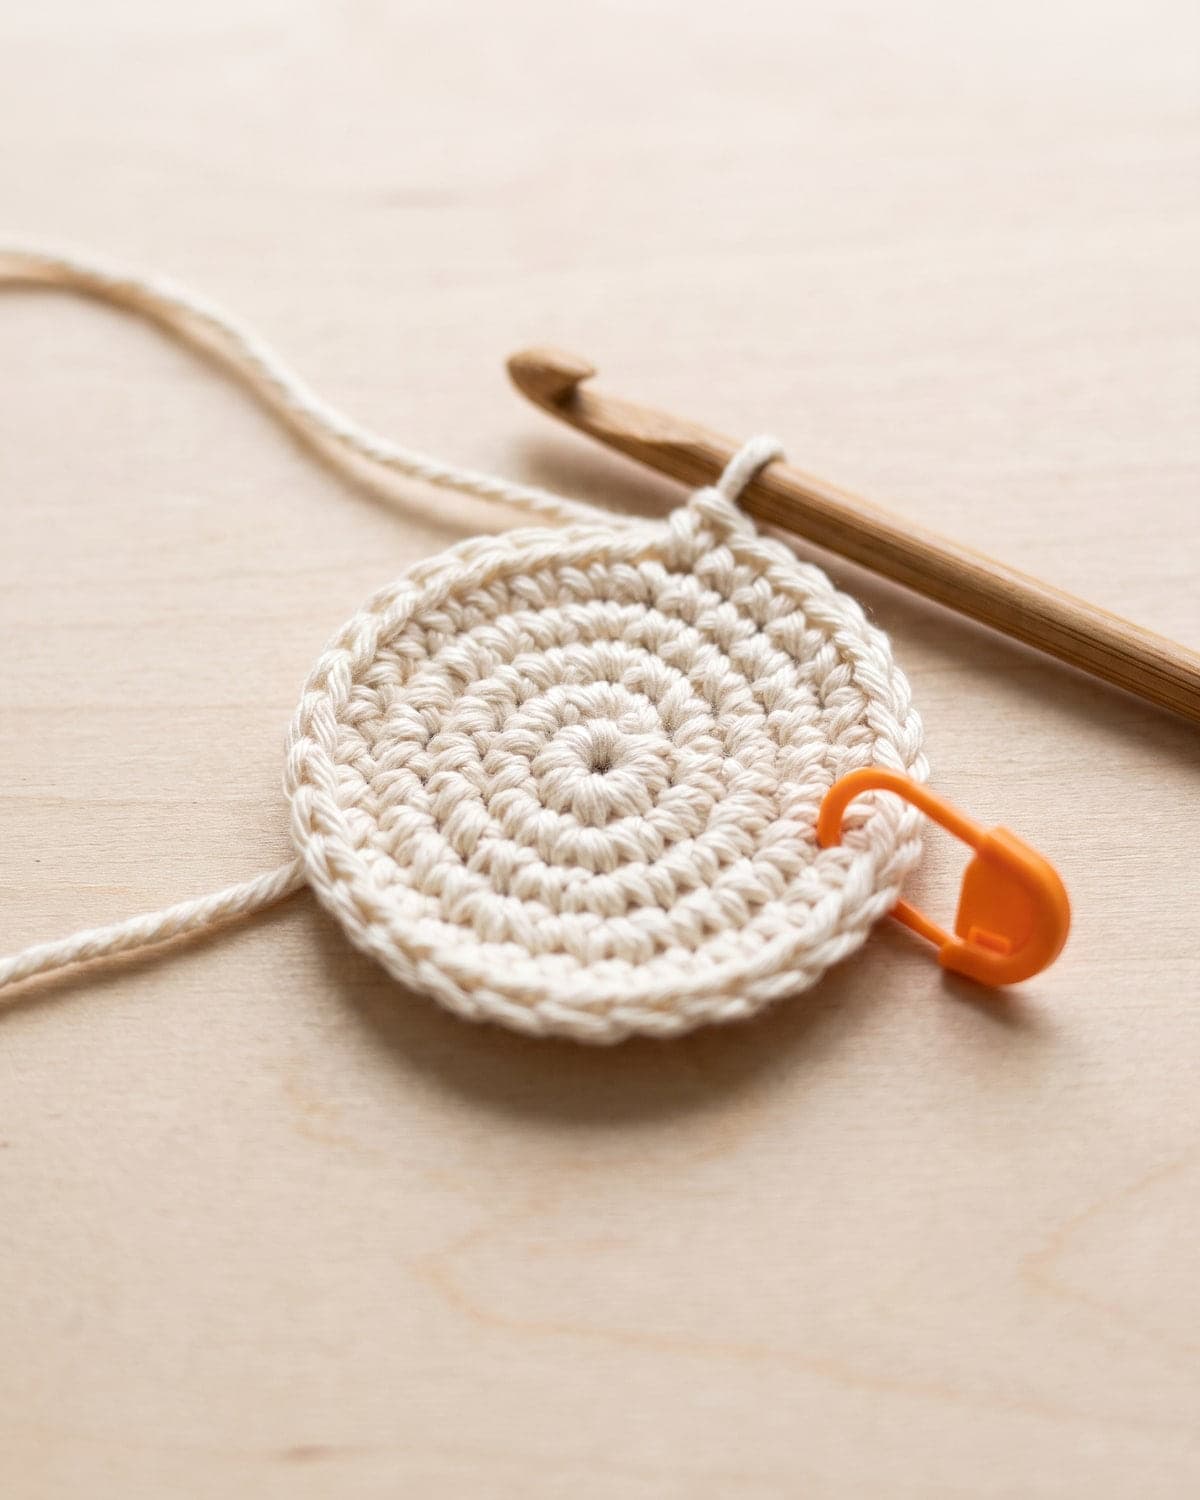
Amigurumi rounds aren't joined. When you finish a round, you simply work the next stitch into the first stitch of the round before. That makes a smooth spiral with no seam.
Because nothing marks the start, clip a stitch marker into the first stitch of every round and move it up each time. Count your stitches at the end of each round until it becomes automatic.
3. Increasing (inc)
An increase is two single crochets worked into the same stitch. Increases spaced evenly around a round make a flat circle that grows by the same number of stitches every round, usually six.
4. The invisible decrease (dec)
A decrease turns two stitches into one. The invisible version is neater than a standard decrease and leaves no bump:
- Insert the hook under the front loop only of the next stitch.
- Without yarning over, insert it under the front loop only of the stitch after that. You have three loops on the hook.
- Yarn over and pull through the first two loops.
- Yarn over and pull through the remaining two loops.
5. Right side and wrong side
A crocheted spiral has two different faces. The right side shows neat little Vs. The wrong side shows horizontal bars. As you work, the piece will try to curl so the wrong side faces out. After a few rounds, flip it so the Vs are on the outside, and keep working around the outside edge. Either side is acceptable, but be consistent across all the parts of one toy.
How to read an amigurumi pattern
Amigurumi patterns are written round by round, with the stitch count in brackets:
R3: (sc, inc) × 6 (18)
This means: in round 3, work one single crochet in the next stitch, then an increase in the stitch after. Do that sequence six times. You should finish with 18 stitches.
| Abbreviation | Meaning |
|---|---|
| MR | magic ring |
| sc | single crochet |
| inc | increase: 2 sc in the same stitch |
| dec | decrease: join 2 stitches into 1 |
| R | round |
| ( ) × 6 | repeat the instructions in brackets 6 times |
| (18) | stitch count at the end of the round |
If your count is wrong at the end of a round, pull that round out and redo it. A missing stitch in round 3 turns into a lopsided head by round 10.
Practice pattern: a simple ball
Every amigurumi head, body and limb is a variation on this shape. Make one before anything else.
- R1: 6 sc in a magic ring (6)
- R2: inc in each stitch around (12)
- R3: (sc, inc) × 6 (18)
- R4: (2 sc, inc) × 6 (24)
- R5 to R8: sc in each stitch around, for 4 rounds (24)
- R9: (2 sc, dec) × 6 (18)
- R10: (sc, dec) × 6 (12)
Stuff the ball firmly now, while the opening is still wide enough.
- R11: dec × 6 (6)
Fasten off, leaving a tail. Thread it onto your needle, pass it through the front loop of each of the 6 remaining stitches, and pull tight to close. Push the needle through the ball, pull gently, and trim so the end disappears inside.
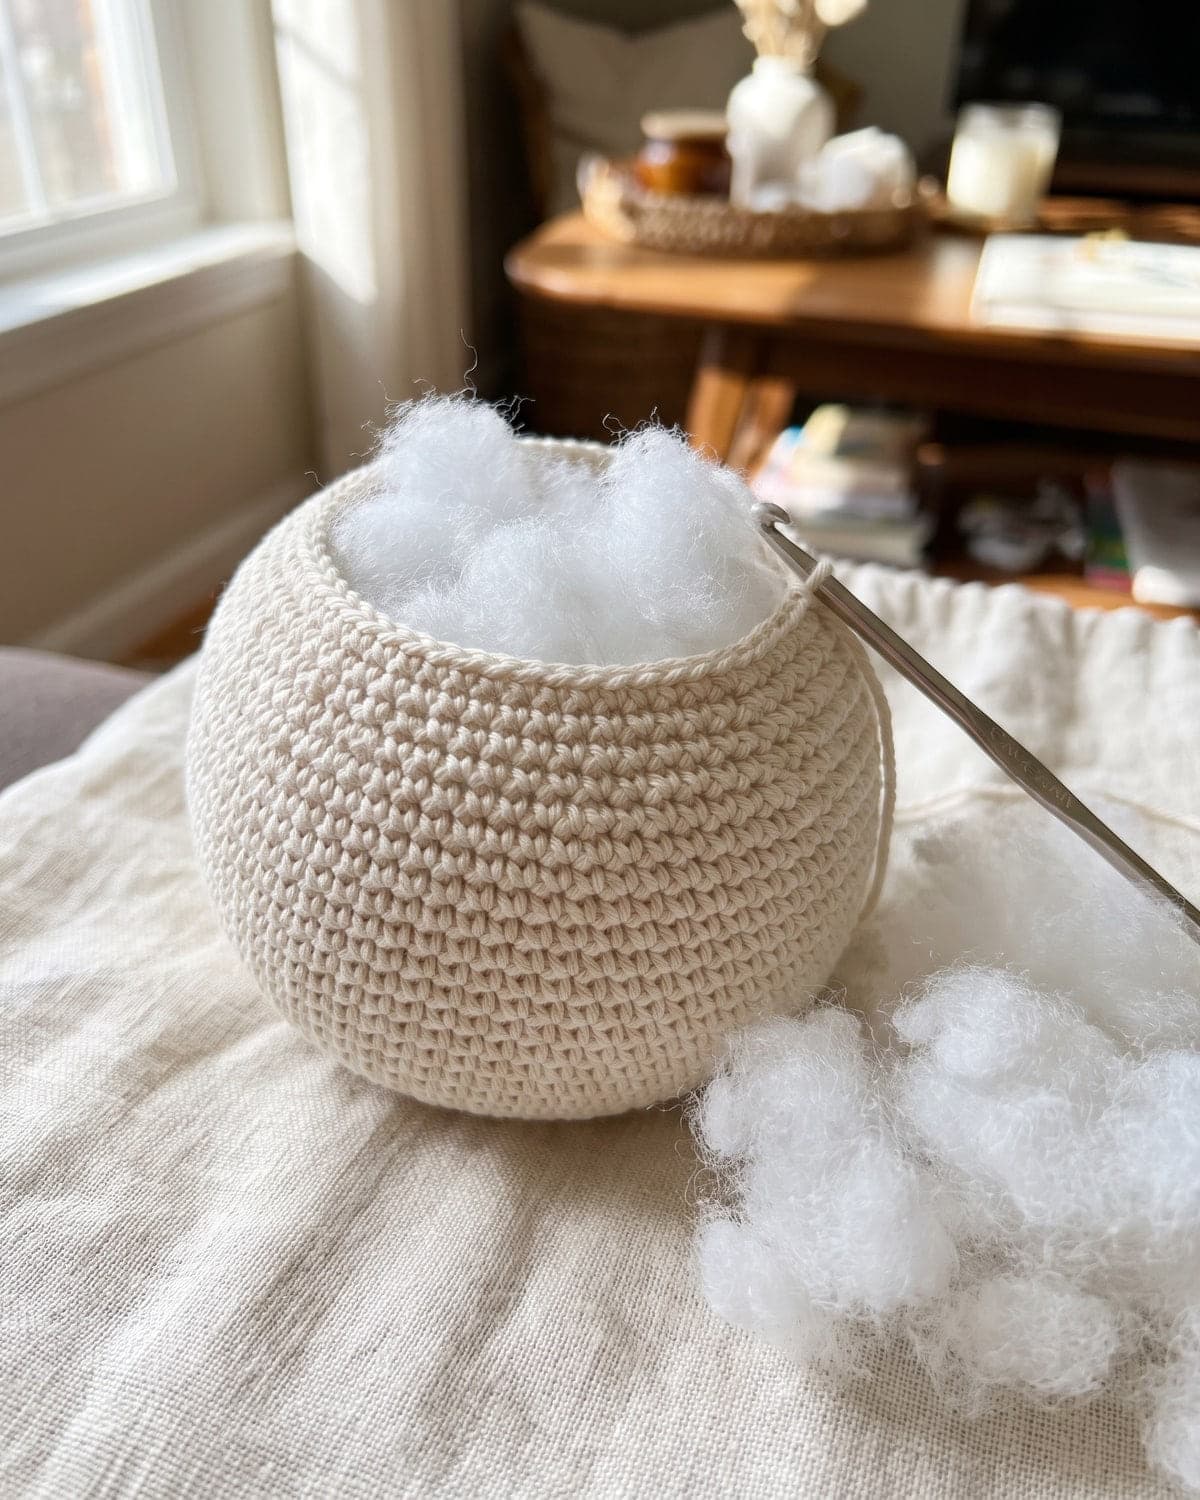 What this teaches you: rounds 1 to 4 are the standard flat circle. Rounds 5 to 8, with no increases, turn the circle into a cup. Rounds 9 to 11 mirror the start and close it. To make a ball bigger, keep increasing for more rounds, add more plain rounds in the middle, then decrease in the reverse order.
How to stuff a toy well
Stuffing changes a toy more than most beginners expect.
- Use small pieces. Tear the fibrefill into small tufts and add them one at a time. One big wad makes lumps.
- Stuff firmly. The piece should feel like a tennis ball, not a marshmallow. Under-stuffed toys go floppy and lose their shape.
- Shape as you go. Push stuffing into the edges with the blunt end of your hook or a chopstick.
- Stuff before the hole gets small. Add most of it when about 12 stitches remain, then top up just before closing.
- Don't over-stuff thin parts. Arms and legs often need only a little, and none at the top where they'll be sewn on.
If you can see stuffing between the stitches, your hook is too large for the yarn. Go down a size.
Your first amigurumi: a simple bear
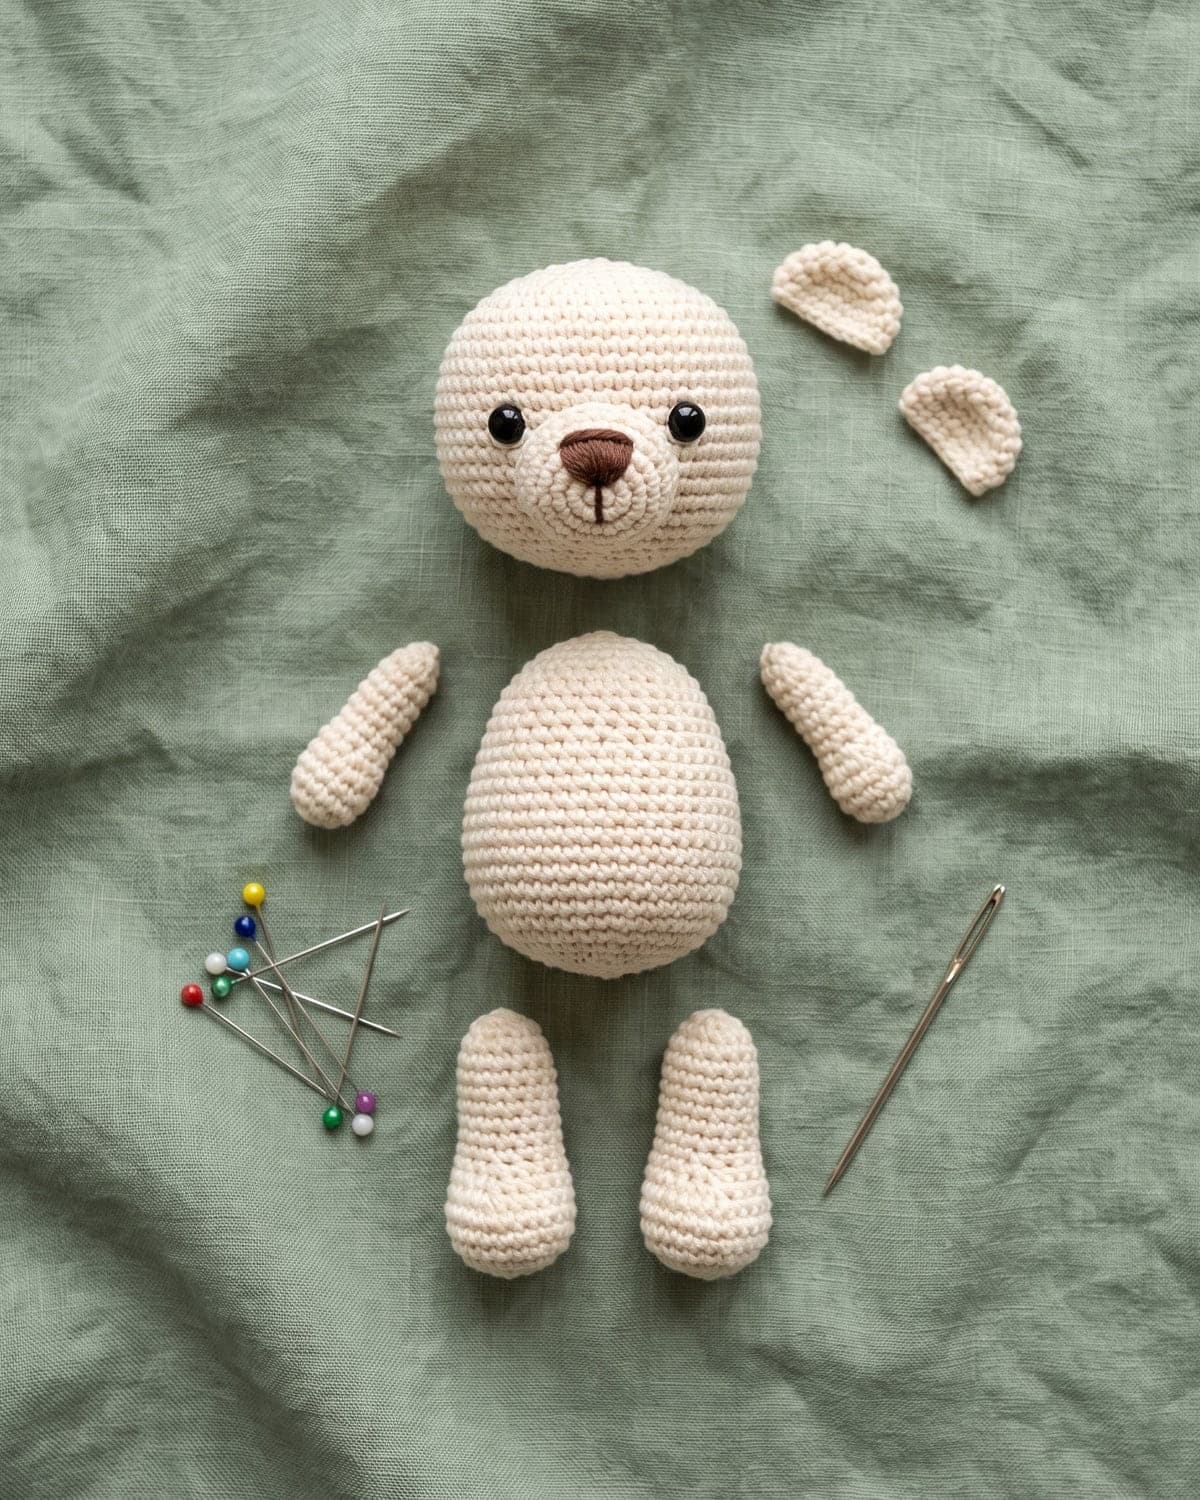
This little bear is made of a head, a body, two ears, two arms and two legs. In DK cotton with a 3 mm hook it sits roughly 10 to 12 cm (4 to 5 in) tall.
Head
- R1: 6 sc in a magic ring (6)
- R2: inc × 6 (12)
- R3: (sc, inc) × 6 (18)
- R4: (2 sc, inc) × 6 (24)
- R5: (3 sc, inc) × 6 (30)
- R6 to R10: sc around, for 5 rounds (30)
If you're using safety eyes, attach them now, between rounds 8 and 9, about 5 stitches apart. Check their position before pushing on the washers, because they don't come off again.
- R11: (3 sc, dec) × 6 (24)
- R12: (2 sc, dec) × 6 (18)
- R13: (sc, dec) × 6 (12)
Stuff firmly.
- R14: dec × 6 (6)
Fasten off and close the hole as for the ball.
Body
- R1: 6 sc in a magic ring (6)
- R2: inc × 6 (12)
- R3: (sc, inc) × 6 (18)
- R4: (2 sc, inc) × 6 (24)
- R5 to R9: sc around, for 5 rounds (24)
- R10: (2 sc, dec) × 6 (18)
- R11 and R12: sc around, for 2 rounds (18)
Slip stitch into the next stitch and fasten off, leaving a long tail for sewing. Stuff firmly. The open top will be sewn to the underside of the head.
Ears (make 2)
- R1: 6 sc in a magic ring (6)
- R2: (sc, inc) × 3 (9)
- R3: sc around (9)
Slip stitch into the next stitch and fasten off with a long tail. Don't stuff. Flatten each ear.
Arms and legs (make 4)
- R1: 6 sc in a magic ring (6)
- R2: (sc, inc) × 3 (9)
- R3 to R6: sc around, for 4 rounds (9)
Slip stitch into the next stitch and fasten off with a long tail. Add a small amount of stuffing to the rounded end only.
Assembly
- Pin everything first. Pin the body under the head, the ears to the top of the head, the arms just below the neck and the legs to the front of the body's base. Look at the bear from the front and the side, and adjust until it looks balanced.
- Sew the body to the head. Use the body's long tail and a whip stitch: go through one stitch of the body's edge, then through a stitch on the head, all the way around. Add a last bit of stuffing to the neck before closing the final few stitches.
- Sew on the ears, flattened, with their open edges against the head. Slightly curving them gives a more bear-like look.
- Sew on the arms and legs. Flatten the open ends and stitch them down.
- Embroider the face. A few horizontal stitches make a nose. A short vertical stitch below it makes a mouth. If you didn't use safety eyes, stitch two small eyes with black yarn.
- Hide the ends. After knotting, push the needle through the toy, pull the tail slightly, and snip. The end springs back inside.
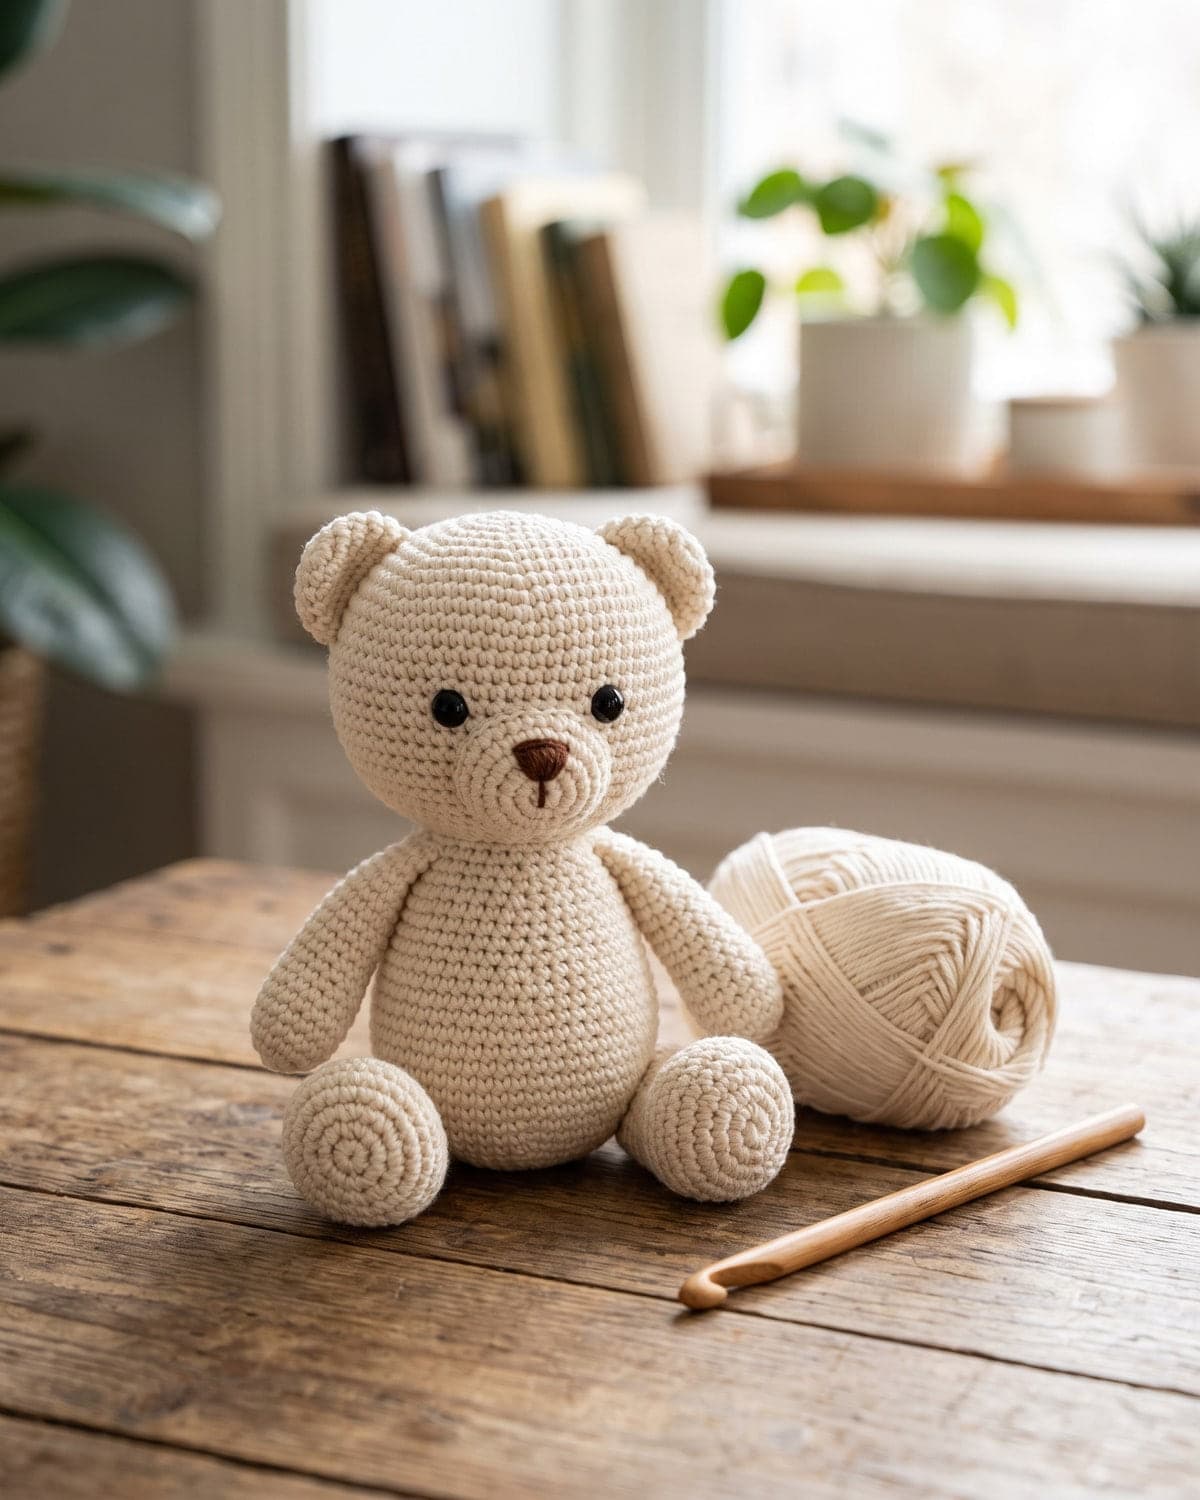 Pinning before sewing is the most useful habit in amigurumi. A head sewn on at a slight tilt can look sweet. Ears sewn on unevenly usually just look wrong.
Common amigurumi problems
There's a hole in the middle of my magic ring. Pull the tail harder, then weave it around the ring once in the opposite direction before trimming.
My stitch count is off. Use a marker in the first stitch of every round and count each round. In "(2 sc, inc)" the increase counts as two stitches.
I can see stuffing. Use a smaller hook or slightly thicker yarn.
My piece is turning inside out. That's normal. Flip it so the V-shaped side faces out.
My decreases leave gaps. Use the invisible decrease, through the front loops only, and pull the stitch snug.
The head wobbles. Stuff the neck area more firmly before closing the seam, and sew around the join twice.
Frequently asked questions
Is amigurumi hard for beginners? Not if you can already make a single crochet. The stitches are simple. The new skills are counting rounds and sewing parts together.
What's the best yarn for amigurumi? Smooth cotton or acrylic. Cotton holds its shape and shows stitches clearly. Avoid fluffy or very dark yarn for your first toys.
Why use such a small hook? A tight fabric keeps the stuffing in and gives the toy a smooth surface.
Do I join my rounds? No. Most amigurumi is worked in a continuous spiral. A pattern will say so if it's joined.
How do I wash an amigurumi toy? Check the yarn label. Most cotton and acrylic toys can be hand washed in cool water, squeezed gently in a towel and left to air dry.
What to make next
Once the ball feels easy, every animal is a new arrangement of the same shapes: longer ears for a bunny, a tail and fins for a whale. Browse the amigurumi section for more patterns.
If the magic ring and working in rounds are still new, practise them on something flat first with these easy crochet coasters, or go back to how to crochet for beginners for the basics. For a small stuffed project without any shaping, try the easy crochet pumpkins.
The background and history of the craft are covered in Wikipedia's article on amigurumi.
Save it for later
Pin this to your Pinterest board so it's there when you're ready to stitch.
Keep stitching
Related crochet projects
Seasonal Crochet Christmas Ornaments: 4 Easy Patterns for Beginners
12 min read
Flowers Easy Crochet Flowers: 4 Simple Patterns for Beginners
11 min read
Home decor Easy Crochet Coasters: Round and Square Patterns for Beginners
10 min read
Amigurumi Easy Crochet Octopus: Free Amigurumi Pattern for Beginners
10 min read