Crochet Turtle Pattern: Free and Easy Amigurumi for Beginners
Crochet a cute amigurumi turtle from simple shapes: a domed shell joined to a flat belly, a round head, four flippers and a tail. Step-by-step rounds, assembly, shell ideas and size changes.
By AlixaPublished 11 min read
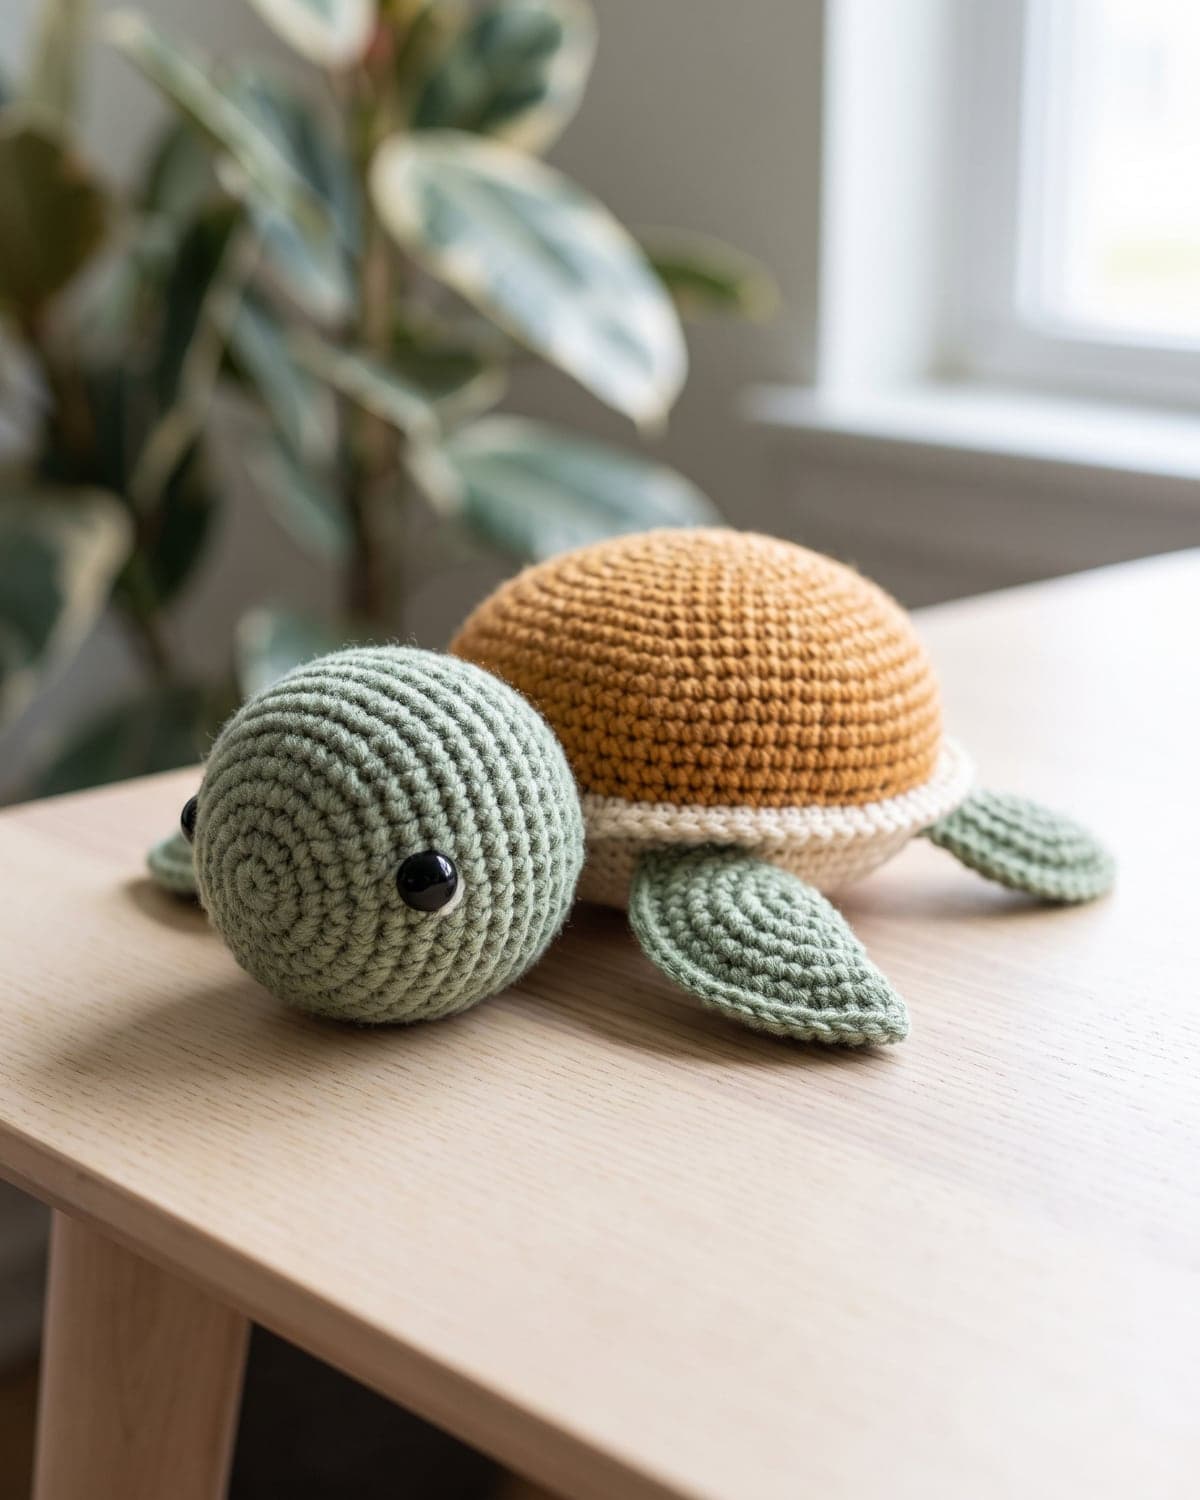
A crochet turtle is a great second or third amigurumi. It's made of simple shapes: a dome for the shell, a flat circle for the belly, a ball for the head and four small flippers. Nothing is fiddly, and the shell and belly are joined by crocheting them together, so there's less sewing than on most toys.
This pattern gives every round with its stitch count. It explains each technique as it comes up, shows how to assemble the turtle so it sits level, and finishes with ways to change the size, the shell and the colours.
Terms used here: US crochet terms. Single crochet (sc) is called double crochet (dc) in UK terms.
About this pattern: it's a simple design written for this guide. Each round's stitch count has been checked so the numbers add up. The finished size is approximate, because it depends on your yarn, hook and how firmly you stuff.
At a glance
| Skill level | Beginner (confident with single crochet in the round) |
| Stitches | Magic ring, single crochet, increase, invisible decrease |
| Yarn | DK cotton (weight 3) in green, brown and cream |
| Hook | 3.5 mm (US E-4) |
| Finished size | About 11 cm (4.5 in) long and 5 cm (2 in) tall |
| Construction | Seven small pieces worked in a spiral, joined and sewn |
What you need
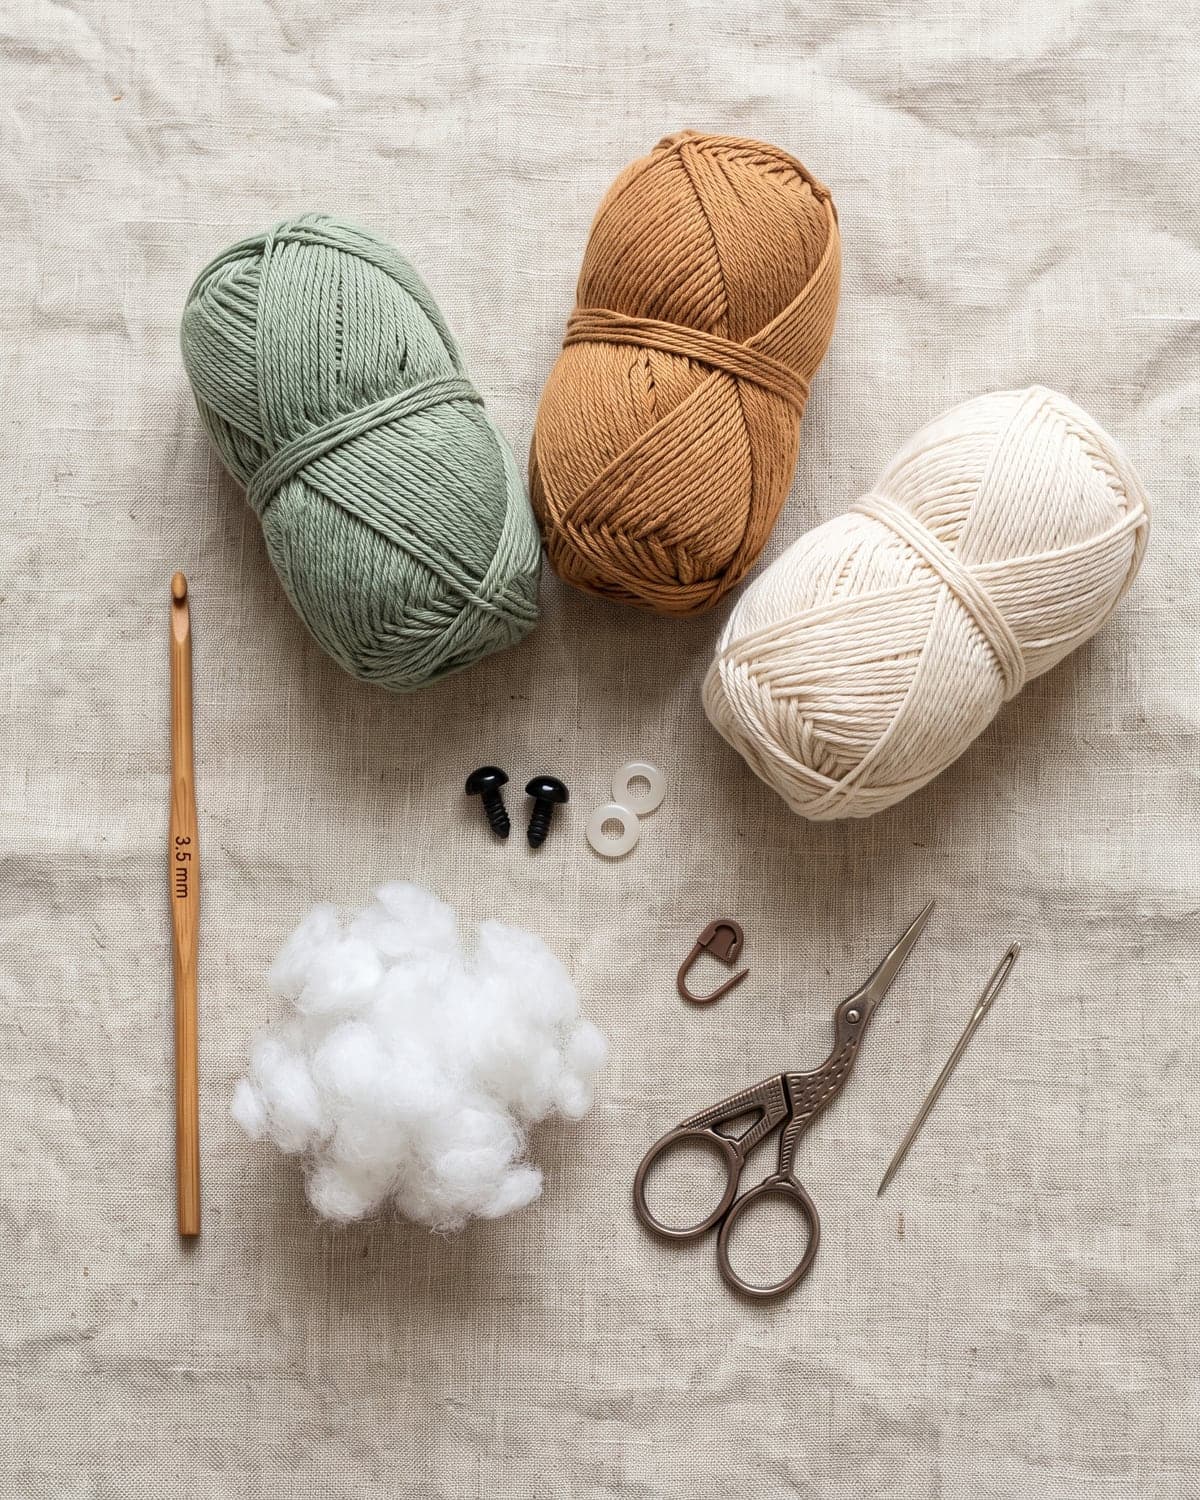
- DK cotton yarn in three colours: green for the head, flippers and tail (about 25 m), brown for the shell (about 25 m) and cream for the belly (about 12 m). Amounts are estimates.
- A 3.5 mm (US E-4) hook. This is smaller than the label suggests, so the fabric is tight enough to hold the stuffing in.
- Polyester fibrefill stuffing.
- Two 6 mm safety eyes, or black yarn to embroider them.
- A locking stitch marker.
- A tapestry needle, scissors and pins.
A safety note before you start
Safety eyes are small, hard parts, and despite the name they can come off. For a baby or a child under three, embroider the eyes with yarn, sew every piece on very firmly and check the toy regularly. The US Consumer Product Safety Commission publishes guidance on small parts in toys for young children.
Techniques used
Everything here is covered in detail in amigurumi for beginners. A quick recap:
- Magic ring. An adjustable loop that closes the centre of the first round. Step-by-step instructions are in how to crochet a magic ring.
- Working in a spiral. Rounds aren't joined. Put a stitch marker in the first stitch of each round and move it up as you go.
- Increase (inc). Two single crochets in the same stitch.
- Invisible decrease (dec). Insert the hook under the front loops only of the next two stitches. Yarn over and pull through both front loops. Yarn over and pull through the two loops on the hook.
Reading the pattern
R4: (2 sc, inc) × 6 (24) means: single crochet in each of the next two stitches, then increase in the next stitch. Do that six times. The round ends with 24 stitches. If the shorthand is new, how to read crochet patterns explains it.
Turtle pattern
Shell
Use brown. Work in a continuous spiral.
- R1: 6 sc in a magic ring (6)
- R2: inc in each stitch around (12)
- R3: (sc, inc) × 6 (18)
- R4: (2 sc, inc) × 6 (24)
- R5: (3 sc, inc) × 6 (30)
- R6: (4 sc, inc) × 6 (36)
- R7 to R10: sc in each stitch around, for 4 rounds (36)
Don't fasten off. Take the loop off your hook and put the stitch marker through it, so it can't unravel while you make the belly.
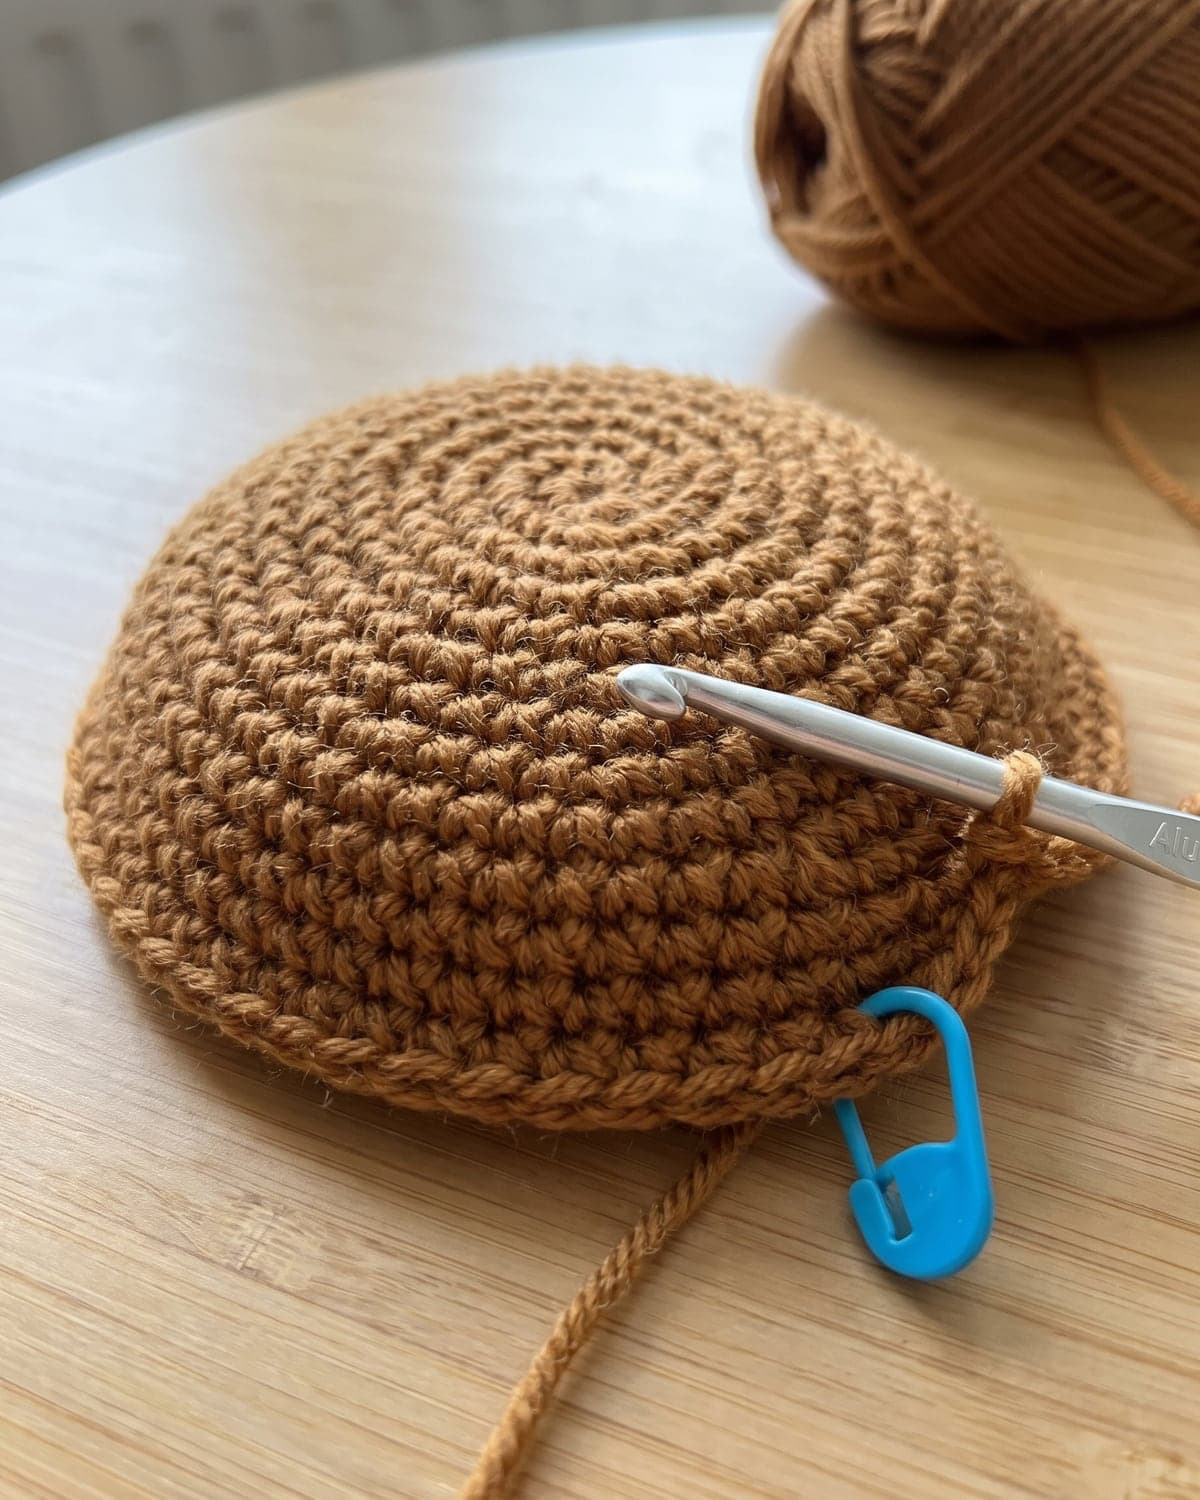 The shell should look like a shallow bowl, with the neat V-shaped stitches on the outside. If you can see horizontal bars on the outside, it has flipped inside out. Push it through.
Belly
Use cream. Work in a spiral.
- R1: 6 sc in a magic ring (6)
- R2: inc in each stitch around (12)
- R3: (sc, inc) × 6 (18)
- R4: (2 sc, inc) × 6 (24)
- R5: (3 sc, inc) × 6 (30)
- R6: (4 sc, inc) × 6 (36)
Slip stitch into the next stitch and fasten off. Weave in the ends. You have a flat circle with 36 stitches around its edge, the same as the shell.
Joining the shell and belly
This is the only unusual step, and it's easier than it sounds.
- Hold the belly against the open edge of the shell, with the right side of the belly facing out, away from the shell.
- Put the brown loop back on your hook.
- Insert the hook through the next stitch of the shell and the matching stitch of the belly, through both loops of each. Yarn over and work a single crochet as usual.
- Carry on around, one single crochet through each pair of stitches.
- When about six stitches are left, stop and stuff the shell. Fill it firmly, pushing the stuffing right out to the edges, so the dome is round and the belly stays flat.
- Finish the round. (36)
Slip stitch into the next stitch and fasten off. Weave the end into the body.
The joining round leaves a neat brown ridge all the way round, like the rim of a real turtle's shell.
Head
Use green. Work in a spiral.
- R1: 6 sc in a magic ring (6)
- R2: inc in each stitch around (12)
- R3: (sc, inc) × 6 (18)
- R4: (2 sc, inc) × 6 (24)
- R5 to R8: sc in each stitch around, for 4 rounds (24)
Eyes: fit the safety eyes now, between rounds 6 and 7, about six stitches apart. Push the posts through and look at the face before you commit. Once the washers click on, they don't come off. Press each washer on firmly from the inside.
- R9: (2 sc, dec) × 6 (18)
- R10: (sc, dec) × 6 (12)
Stuff the head firmly.
- R11: sc in each stitch around (12)
Slip stitch into the next stitch and fasten off, leaving a tail of about 30 cm (12 in) for sewing. Round 11 forms a short neck. Leave it open.
Flippers (make 4)
Use green. Work in a spiral.
- R1: 6 sc in a magic ring (6)
- R2: (sc, inc) × 3 (9)
- R3 to R5: sc in each stitch around, for 3 rounds (9)
- R6: (sc, dec) × 3 (6)
Slip stitch into the next stitch and fasten off, leaving a 20 cm (8 in) tail. Don't stuff. Press each flipper flat.
Tail
Use green.
- R1: 4 sc in a magic ring (4)
- R2: (sc, inc) × 2 (6)
- R3: sc in each stitch around (6)
Slip stitch and fasten off, leaving a 15 cm (6 in) tail. Don't stuff. Press it flat.
Assembly
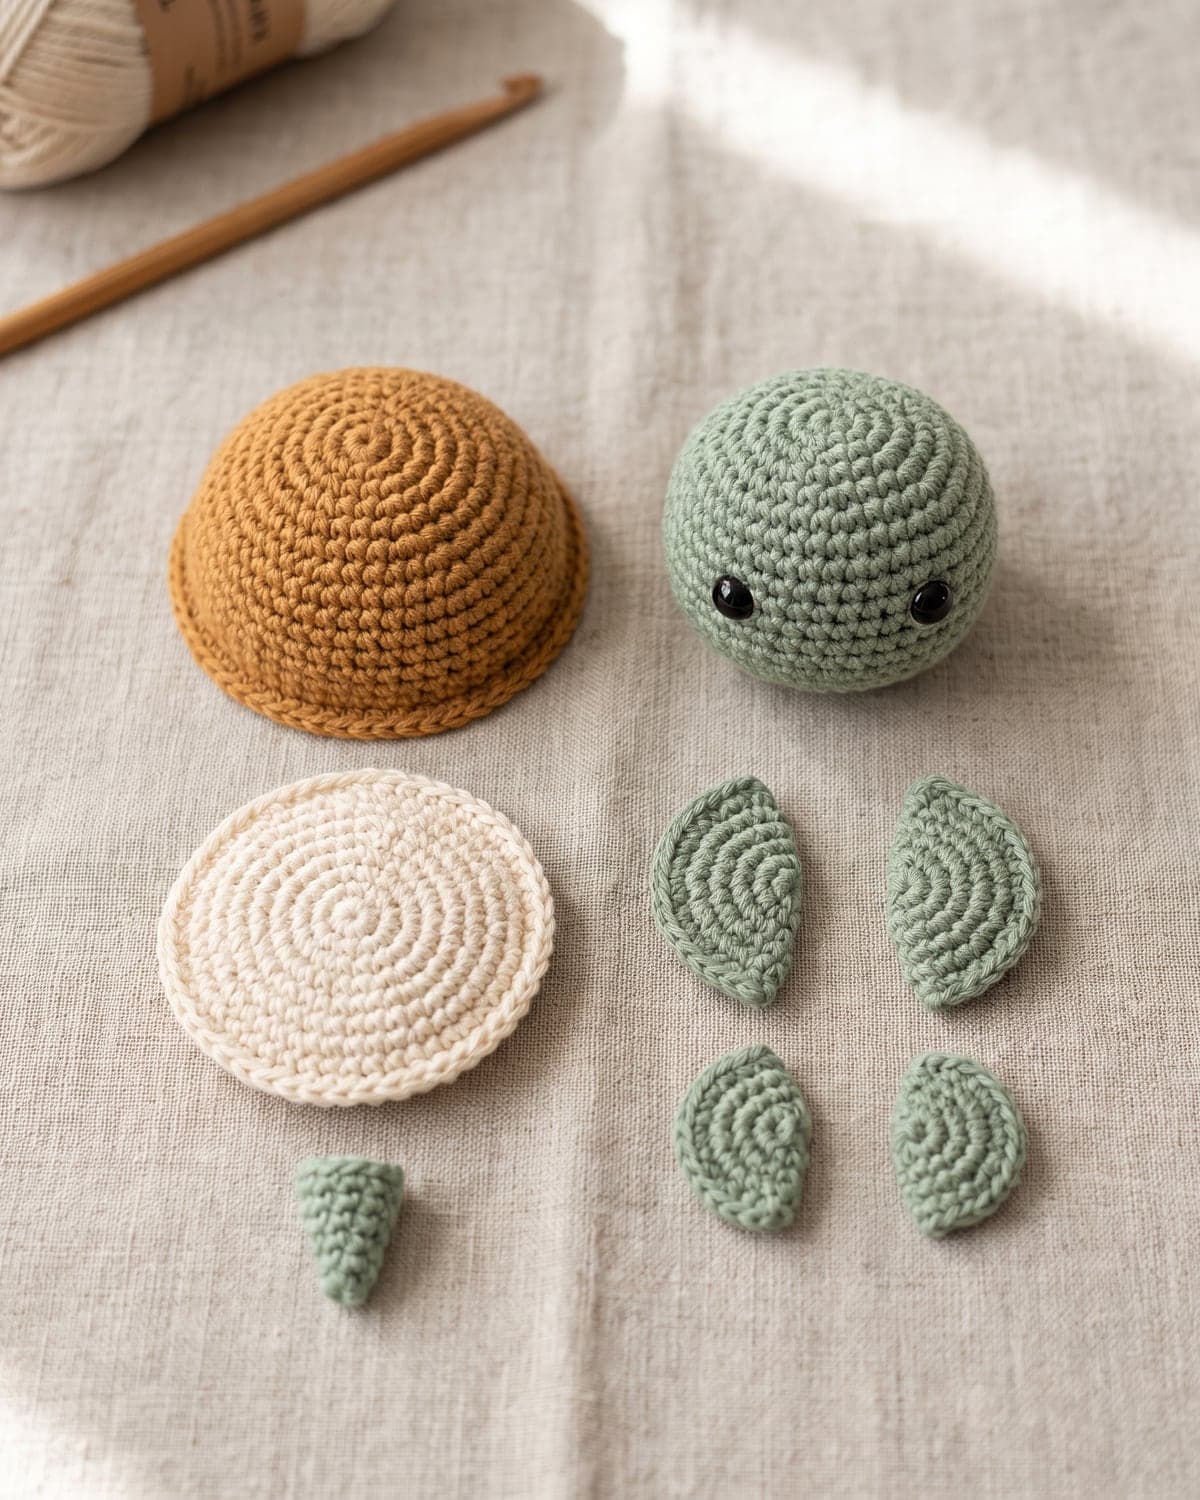
Take your time with this part. Placement is what gives the turtle its character.
- Find the front. Any point on the rim will do. Mark it with a pin.
- Pin the head. Hold the open neck against the body at the front, just below the brown ridge, so it rests half on the belly edge and half on the side of the shell. Tilt the head up slightly. Pin it in place.
- Sew the head. Thread the head's yarn tail onto your needle. Sew around the neck, taking one stitch from the neck edge and one from the body each time. Before closing the last gap, push a little more stuffing into the neck so the head doesn't flop. Knot the yarn and hide the end inside the body.
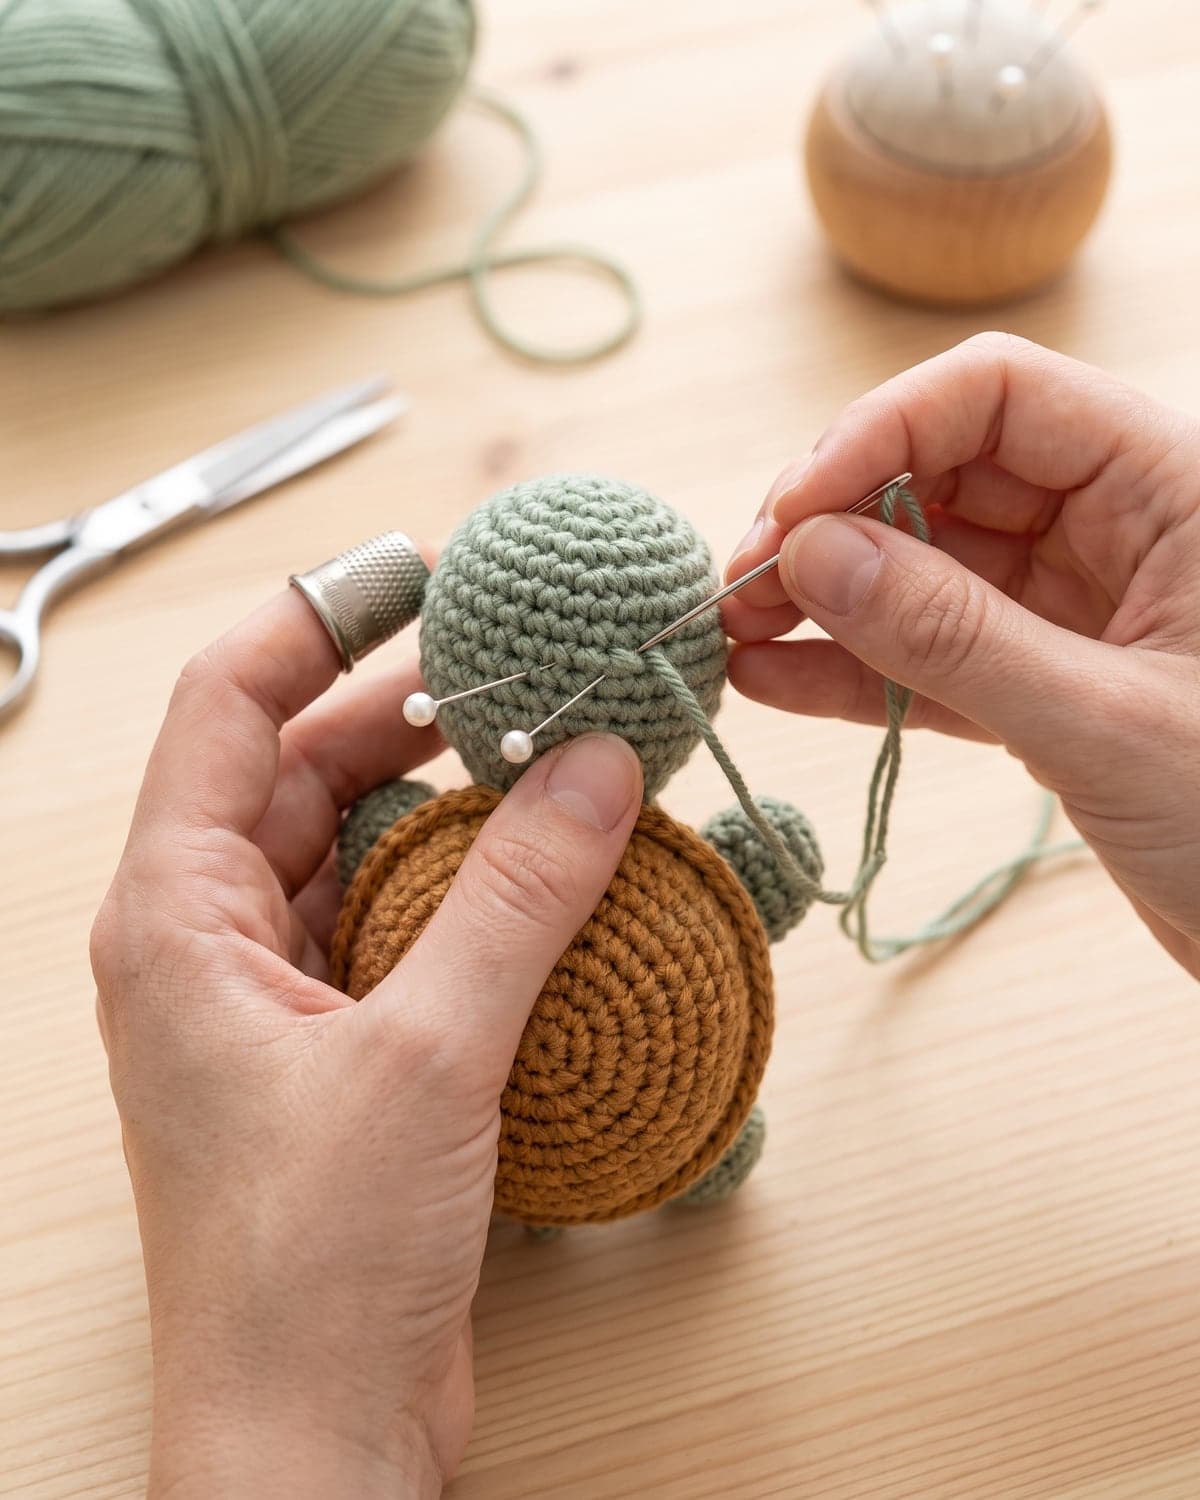 4. Pin the flippers. Place the two front flippers on the seam, about four stitches back from the head on each side, angled forwards. Place the two back flippers about six stitches before the tail position, angled backwards. Look at the turtle from above and check that both sides match.
5. Sew the flippers. Flatten the open end of each flipper and whip stitch it to the body just under the ridge. Go round twice for strength.
6. Sew the tail to the centre back, under the ridge.
7. Add a smile. With black or dark brown yarn, make one small curved stitch two rounds below the eyes.
4. Pin the flippers. Place the two front flippers on the seam, about four stitches back from the head on each side, angled forwards. Place the two back flippers about six stitches before the tail position, angled backwards. Look at the turtle from above and check that both sides match.
5. Sew the flippers. Flatten the open end of each flipper and whip stitch it to the body just under the ridge. Go round twice for strength.
6. Sew the tail to the centre back, under the ridge.
7. Add a smile. With black or dark brown yarn, make one small curved stitch two rounds below the eyes.
Hide all the yarn ends by running them through the stuffed body and trimming them close.
Decorating the shell
A plain shell looks good. A decorated one looks like a turtle.
- Embroidered lines. With cream or darker brown yarn, backstitch a hexagon on top of the shell, between rounds 3 and 4. Then stitch a line from each corner of the hexagon down to the rim.
- Spots. Make French knots, or small straight stitches, in a lighter colour.
- Stripes. Change colour every two rounds while you crochet the shell.
- A ridge. Work round 7 of the shell in the back loops only. The unused front loops make a line around the shell.
- Flowers. Sew a few tiny blooms from easy crochet flowers on top for a garden turtle.
Variations
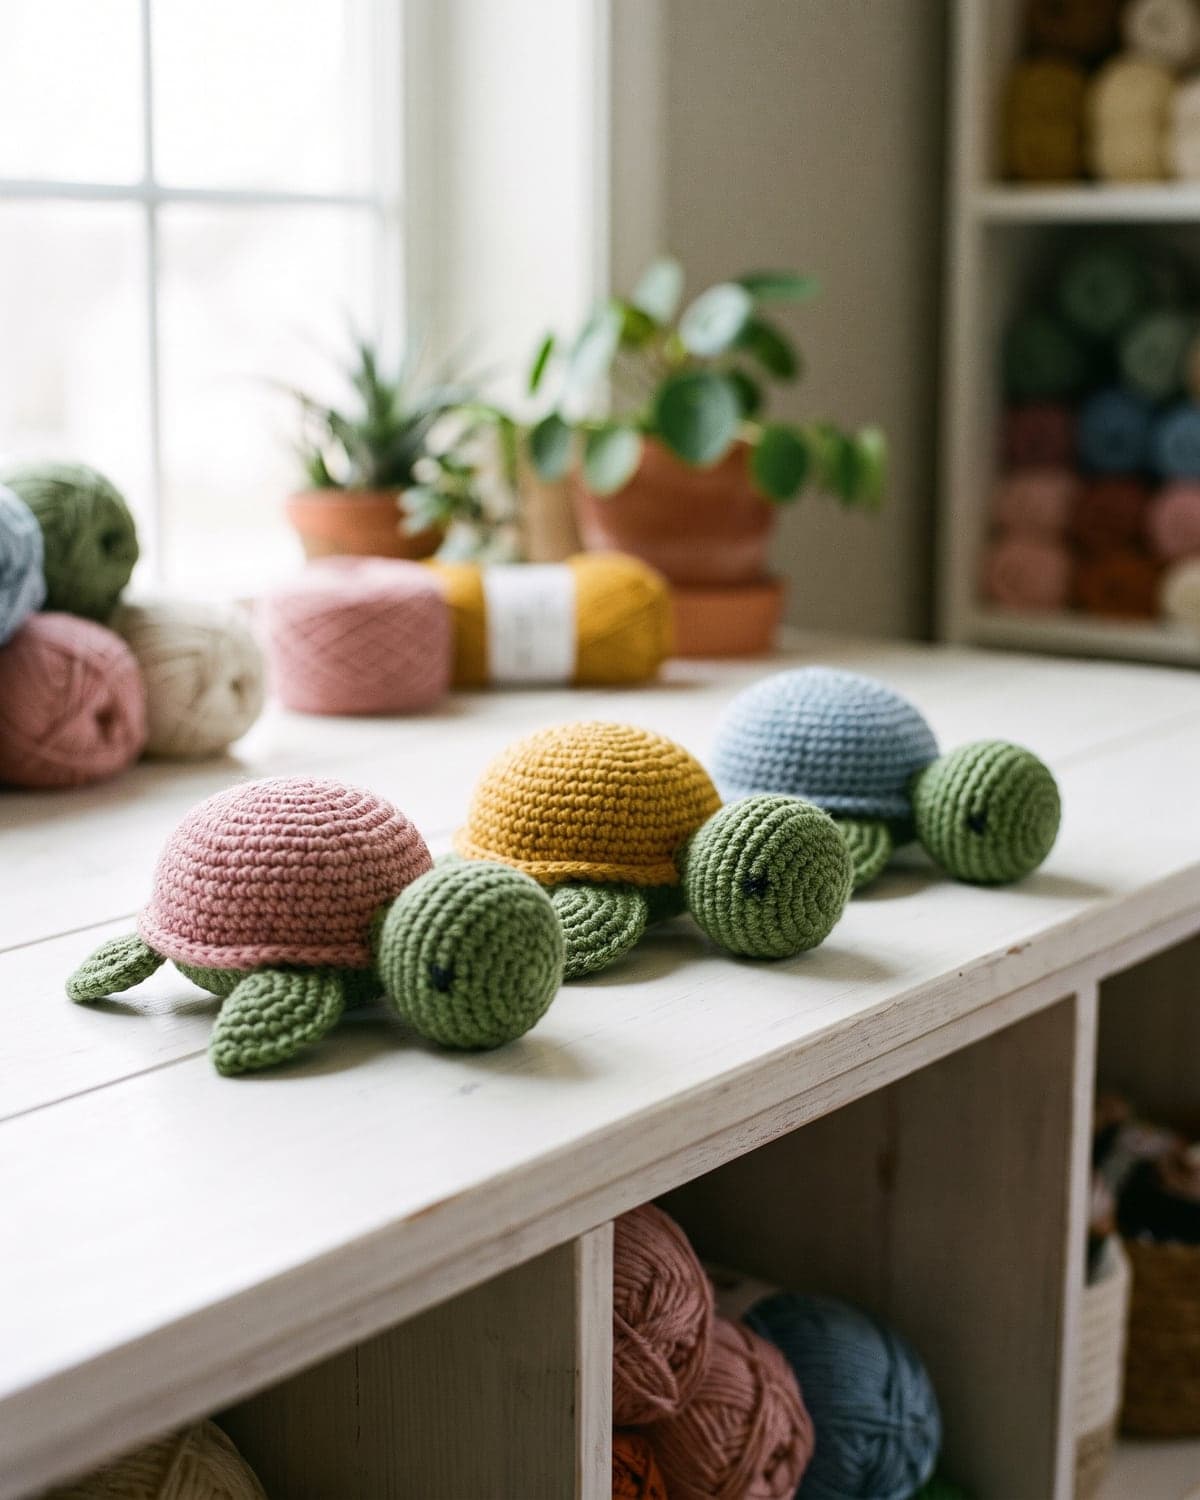
A baby turtle
Stop increasing the shell and the belly after round 5 (30 stitches) and work 3 plain rounds on the shell. For the head, stop increasing after round 3 (18 stitches), work 3 plain rounds, then decrease with (sc, dec) × 6 (12) and work one neck round. Use the flippers as written.
A bigger turtle
Add one more increase round to the shell and the belly: R7: (5 sc, inc) × 6 (42). Work 5 plain rounds on the shell. For the head, add R5: (3 sc, inc) × 6 (30), work 5 plain rounds, then decrease: (3 sc, dec) × 6 (24), (2 sc, dec) × 6 (18), (sc, dec) × 6 (12), and one neck round.
Plush turtle
Use chenille or velvet yarn and a 5 mm hook with the same pattern. The turtle will be about twice the size and very soft. The stitches are hard to see in plush yarn, so count carefully and use your stitch marker.
Keyring turtle
Use fine cotton and a 2.5 mm hook, and sew a split ring to the top of the shell.
Sea turtle
Make the front flippers longer: work 6 plain rounds instead of 3. Sew them on pointing out to the sides.
Choosing colours
- Classic: green body, brown shell.
- Sweet shop: a mint body with a pink shell, or a cream body with a caramel shell.
- Ocean: teal body, sand-coloured shell with dark green lines.
- Bright: every piece in a different colour, from your scrap bag.
Light colours show your stitches most clearly while you're learning. Very dark brown makes it hard to see where the hook goes, so work in good light.
Tips for a neat finish
- Keep your stitches tight. If stuffing shows through the fabric, go down a hook size.
- Count every round. Each increase round adds six stitches.
- Use the invisible decrease. It leaves a smoother surface than an ordinary decrease.
- Stuff the shell well. A firm dome keeps its shape. An under-stuffed one dents.
- Keep the belly flat. Push the stuffing up into the dome, not down against the belly.
- Pin everything before you sew anything. It's much easier to move a pin than to unpick a seam.
- Set the eyes low and wide. Eyes in the lower half of the head, fairly far apart, look cuter.
Common problems and fixes
The shell and belly don't match up. One has a different stitch count. Both must have 36. If you're one or two stitches out, work two belly stitches together, or put two stitches into one, as you join.
The belly bulges. Too much stuffing went in at the end, or it's sitting low. Push it up into the shell before closing.
The shell is pointed. The magic ring wasn't pulled tight, or round 2 has too few stitches. Check for 12 after round 2.
The head droops. The neck needs more stuffing, or the head is sewn only at the top. Stitch all the way around the neck.
The turtle rocks from side to side. The flippers are at different heights. Sew all four at the same level on the seam.
The eyes are uneven. Count the stitches between the eyes, and check both are in the same round before you fit the washers.
The flippers flare open. Flatten and whip stitch the open end closed first, then sew it to the body.
Frequently asked questions
Is a crochet turtle easy for beginners? Yes, once you can single crochet in the round, increase and decrease. Every piece is a basic shape.
How long does it take to crochet a turtle? Around three to four hours, including sewing. It's a comfortable weekend project.
How much yarn do I need? About 60 metres of DK yarn in total, across three colours. Leftovers are usually enough.
What yarn is best? Smooth cotton or acrylic in DK or worsted weight. Cotton shows the stitches clearly and keeps its shape.
Can I make it without safety eyes? Yes. Embroider the eyes with a few stitches of black yarn. This is the safer choice for young children.
Can I wash it? Hand wash in cool water with mild soap, squeeze out the water in a towel, reshape and dry flat.
Can I sell turtles made from this pattern? Yes. You're welcome to sell what you make.
What to make next
- For a toy with almost no sewing, make the easy crochet octopus.
- For long ears and a pompom tail, try the crochet bunny pattern.
- For the first bear and a full explanation of the basics, go back to amigurumi for beginners.
- For a quick seasonal toy, see the crochet ghost pattern.
More toys are in the amigurumi section. The history of the craft is covered in Wikipedia's article on amigurumi.
Save it for later
Pin this to your Pinterest board so it's there when you're ready to stitch.
Keep stitching
Related crochet projects
Amigurumi Crochet Bunny Pattern: Free Easy Amigurumi Rabbit
11 min read
Amigurumi Amigurumi for Beginners: How to Crochet Your First Animal
10 min read
Flowers Crochet Sunflower Pattern: Easy Free Tutorial in 3 Simple Parts
11 min read
Clothing Easy Crochet Scarf for Beginners: One Stitch, Free Pattern
10 min read