Crochet Bag Charm for Beginners: Free Pattern for a Kawaii Turtle
Make your first crochet bag charm with this free pattern: a small kawaii turtle worked from the easiest piece to the hardest, with the magic ring, increases, decreases and sewing explained step by step.
By AlixaPublished 13 min read
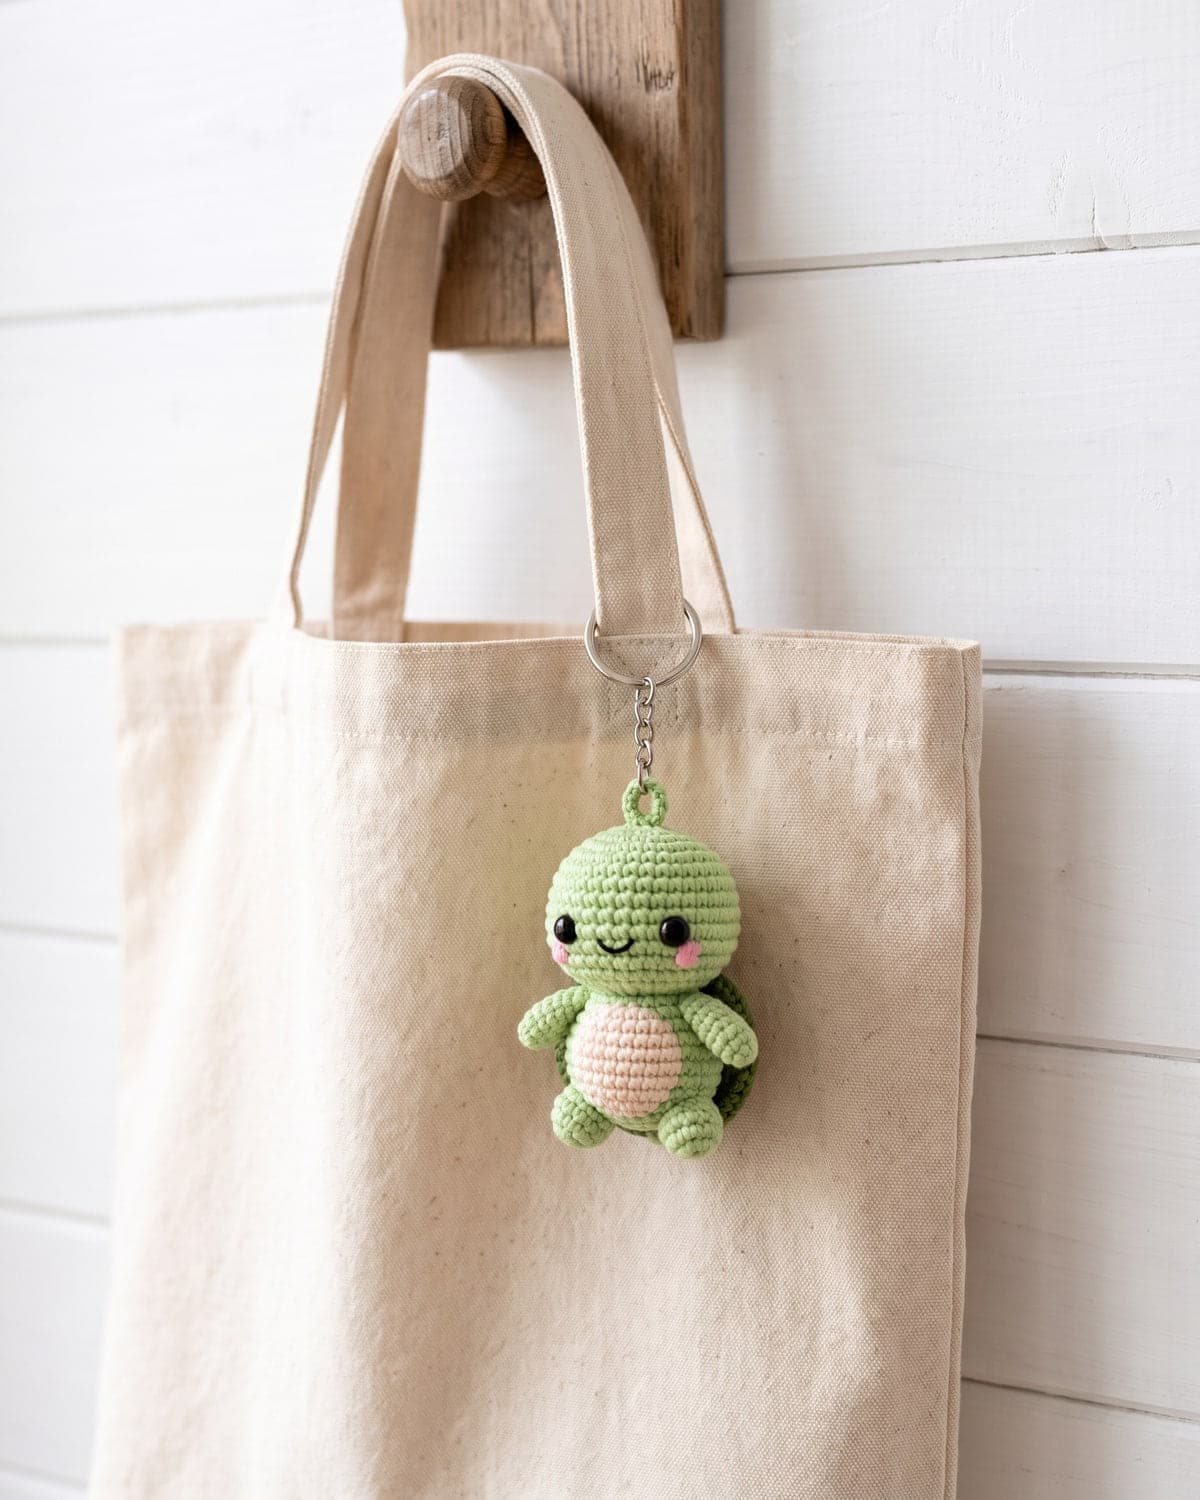
A crochet bag charm is one of the best first amigurumi projects. It's small, so it uses very little yarn. Each piece takes a few minutes, so you practise the same skills several times in one sitting. And at the end you have something to clip to a tote, a backpack or a set of keys.
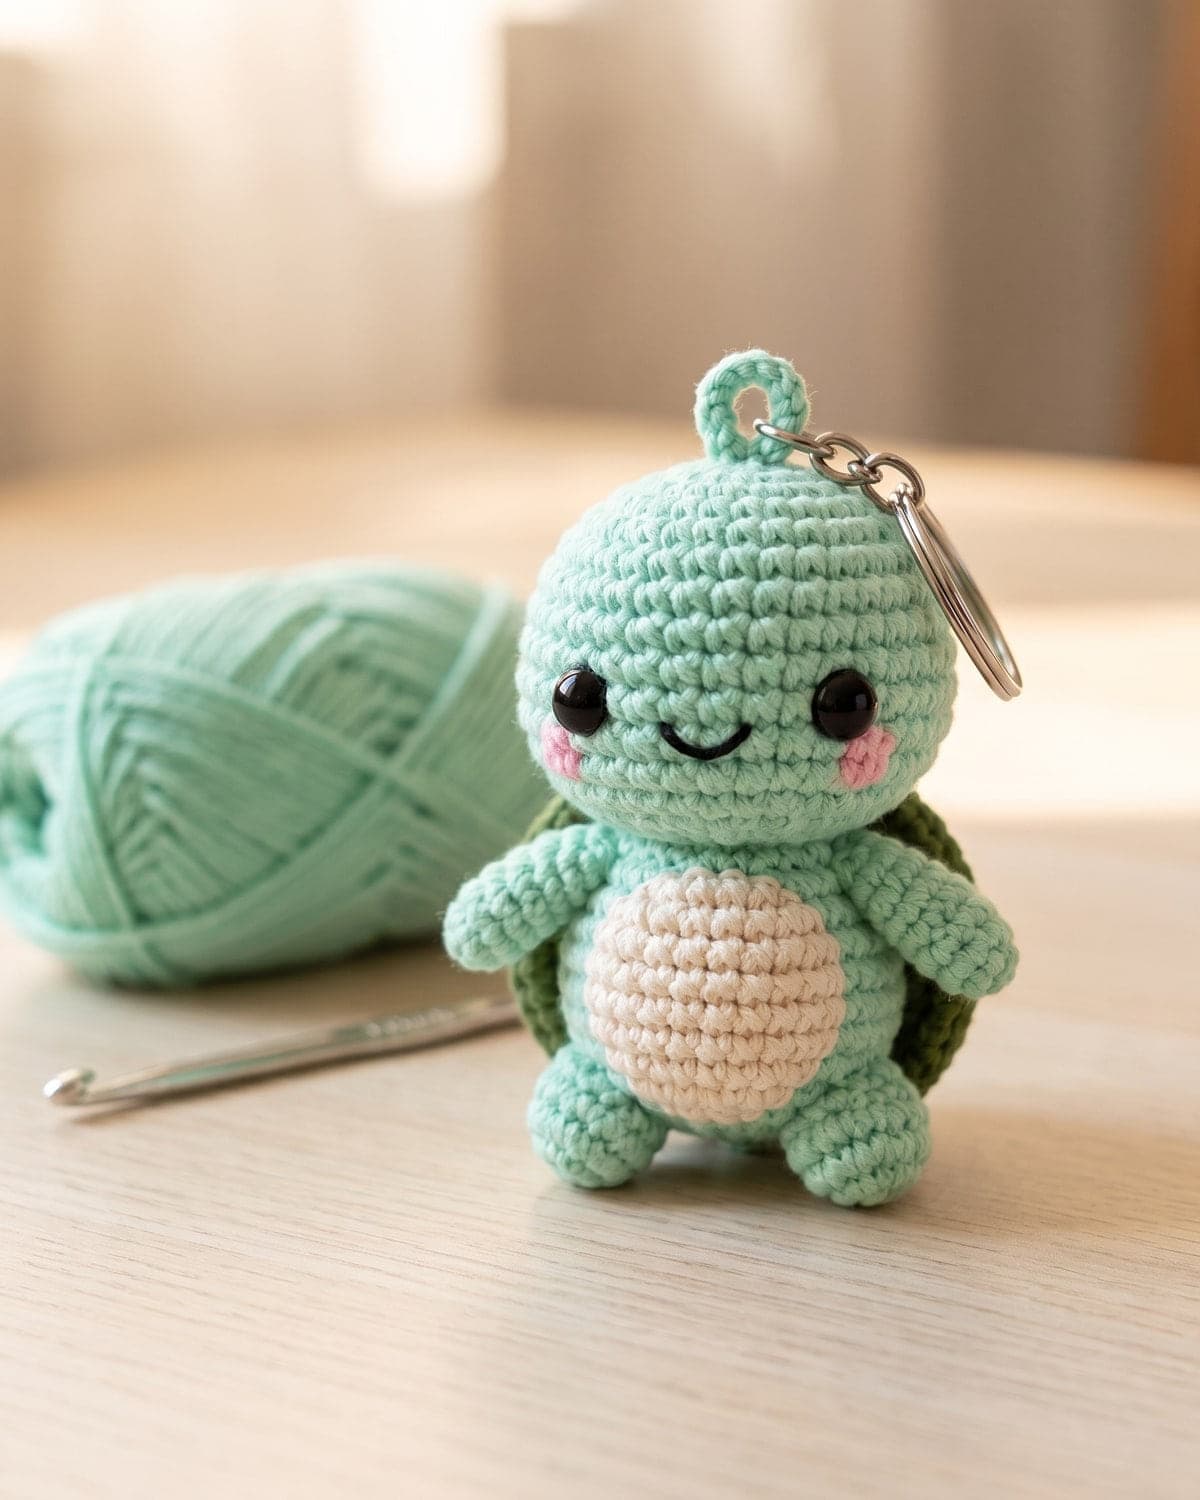
This tutorial makes a small kawaii turtle, about 8.5 cm (3.35 in) tall. It's written for someone who has never made a toy before. The pieces are arranged from easiest to hardest, so each one teaches a skill you need for the next. Every round has its stitch count, and the first rounds are also written out in plain words.
Terms used here: US crochet terms. Single crochet (sc) is called double crochet (dc) in UK terms.
About this pattern: it's the Minty Turtle Keyring design, worked here in a beginner-friendly order. Each round's stitch count has been checked so the numbers add up. Your finished size will depend on your yarn, your hook and your stuffing.
At a glance
| Skill level | Beginner (you can make a chain and a single crochet) |
| New skills | Magic ring, spiral rounds, increase, invisible decrease |
| Yarn | DK cotton (weight 3), about 40 to 45 g in three colours |
| Hook | 2.5 mm |
| Time | Two or three evenings, or one slow afternoon |
| Finished size | About 8.5 cm (3.35 in) tall, not counting the metal ring |
Why a bag charm is a good first toy
- The pieces are tiny. The biggest round has 36 stitches. If a piece goes wrong, you lose ten minutes, not a weekend.
- Eight of the nine pieces start the same way. By the time you reach the head, you've made the first two rounds seven times.
- Only one stitch is used. Everything is single crochet. The shapes come from adding and removing stitches.
- It doesn't have to be perfect. A slightly uneven turtle still looks sweet.
If you have never held a hook, start with how to crochet for beginners. Make a small square of single crochet first, then come back.
What you need
- DK cotton yarn (weight 3, also called light worsted) in mint green (20 to 25 g), dark olive green (10 to 12 g) and cream (4 to 5 g). Amounts are estimates.
- A little pink yarn and black embroidery thread for the face.
- A 2.5 mm crochet hook. It feels small for this yarn. That's on purpose: tight stitches hide the stuffing.
- Two 6 mm safety eyes, or use the black thread.
- Polyester fibrefill, a small handful (8 to 12 g).
- A 25 to 30 mm split key ring, or a lobster clasp for a bag.
- A yarn needle, a locking stitch marker, scissors and pins.
Why cotton? Cotton is smooth and doesn't split much, so you can see each stitch. Fluffy or very dark yarn hides the stitches, which makes counting hard. Mint and cream are easy colours to learn on. Not sure what "weight 3" means? The Craft Yarn Council's yarn weight chart lists every category.
A safety note. Safety eyes and metal rings are small parts. Don't give this charm to a baby or a child under three. For a young child, embroider the eyes and leave the ring off. The US Consumer Product Safety Commission explains the rules on small parts.
The five skills you'll use
1. The magic ring
A magic ring is an adjustable loop. You crochet the first round into it, then pull the tail and the hole in the middle closes.
- Wrap the yarn around two fingers to make a loop, with the tail hanging in front.
- Push the hook through the loop, catch the working yarn and pull it through.
- Chain 1. This holds the loop.
- Work 6 single crochets into the loop, over both the loop and the tail.
- Pull the tail. The stitches close into a tight circle.
Step-by-step photos are in how to crochet a magic ring. It often takes three or four tries. That's normal.
2. Working in a spiral
You don't join the rounds. You just keep going, round and round. Because of that, you can't see where a round begins. Clip your stitch marker into the first stitch of every round. When you reach the marker again, the round is finished. Take it out, make the stitch, and clip it back into that new stitch.
3. The increase (inc)
Make two single crochets in the same stitch. That adds one stitch and makes the circle wider.
4. The invisible decrease (dec)
This turns two stitches into one, and it leaves no gap.
- Push the hook under the front loop only of the next stitch.
- Without yarning over, push it under the front loop of the stitch after that. You have three loops on the hook.
- Yarn over and pull through the first two loops.
- Yarn over and pull through the last two.
5. Reading a round
R3: (sc, inc) × 6 (18) means: one single crochet in the next stitch, then an increase in the stitch after it. Repeat that pair six times. Count your stitches. You should have 18. For more on the shorthand, see how to read crochet patterns.
Piece 1: the belly patch (your practice circle)
 Start with the cream belly. It's a flat circle with only four rounds, and it teaches the magic ring and the increase.
- R1: 6 sc in a magic ring (6)
- R2: inc in each stitch around (12)
- R3: (sc, inc) × 6 (18)
- R4: (2 sc, inc) × 6 (24)
In plain words: make 6 stitches in the ring. In round 2, put two stitches into every stitch. In round 3, make one normal stitch, then two in the next, and repeat. In round 4, make two normal stitches, then two in the next, and repeat.
Cut the yarn, leaving a tail about 30 cm (12 in) long, and pull it through the loop on your hook. This is called fastening off.
Check your work. The circle should lie flat and measure about 3 to 3.4 cm (1.2 to 1.35 in) across. If it's bigger and you can see through it, crochet more tightly. If it curls into a bowl, you missed some increases. Count 24 stitches around the edge.
Piece 2: the legs (make 2)
The legs add the decrease. Use mint.
- R1: 6 sc in a magic ring (6)
- R2: inc in each stitch around (12)
- R3 and R4: sc in each stitch around, for 2 rounds (12)
Push in a tiny piece of stuffing.
- R5: dec × 6 (6)
Fasten off with a long tail. Thread it onto your needle, pass it through the front loop of each of the 6 stitches and pull. The hole closes. Don't cut the tail. You'll sew with it later.
Piece 3: the arms (make 2)
Use mint.
- R1: 6 sc in a magic ring (6)
- R2: inc in each stitch around (12)
- R3 and R4: sc in each stitch around, for 2 rounds (12)
- R5: (sc, dec) × 4 (8)
Don't stuff the arms. Press the open end flat and sew it shut with a few stitches. Leave a 20 cm (8 in) tail.
Piece 4: the tail
Use mint. This one is fiddly because it's so small. Go slowly.
- R1: 4 sc in a magic ring (4)
- R2: sc in each stitch around (4)
- R3: (sc, inc) × 2 (6)
Fasten off with a long tail. Don't stuff it. The pointed end is the tip.
Piece 5: the shell
Use dark olive. The shell is the belly circle with two more increase rounds, then a rim.
- R1: 6 sc in a magic ring (6)
- R2: inc in each stitch around (12)
- R3: (sc, inc) × 6 (18)
- R4: (2 sc, inc) × 6 (24)
- R5: (3 sc, inc) × 6 (30)
- R6: (4 sc, inc) × 6 (36)
- R7: sc in the back loop only of each stitch around (36)
- R8: sc in each stitch around (36)
Look at the top of a stitch. It's a small V. The half of the V nearest you is the front loop. The half further away is the back loop. In round 7, the hook goes under the back loop only. This makes the edge fold down, so the flat circle becomes a shallow cup.
Fasten off with a long tail.
Optional shell lines. With olive yarn and a needle, make 6 straight stitches from near the centre out towards the edge, like the spokes of a wheel. Then join the spokes with short stitches around rounds 3 and 4 to make a small hexagon. Skip this on your first turtle if you like.
Piece 6: the body
Use mint. This is your first closed, stuffed shape. Round 1 is the bottom.
- R1: 6 sc in a magic ring (6)
- R2: inc in each stitch around (12)
- R3: (sc, inc) × 6 (18)
- R4: (2 sc, inc) × 6 (24)
- R5: (3 sc, inc) × 6 (30)
- R6 to R8: sc in each stitch around, for 3 rounds (30)
- R9: (3 sc, dec) × 6 (24)
- R10 and R11: sc in each stitch around, for 2 rounds (24)
- R12: (2 sc, dec) × 6 (18)
Stuff the body now. Use small pieces and push them down to the bottom first, so the lower half is round and firm.
- R13: sc in each stitch around (18)
- R14: (sc, dec) × 6 (12)
- R15: dec × 6 (6)
Fasten off and close the hole as you did for the legs. Hide this tail inside the body.
Piece 7: the head
Use mint. The head is the biggest piece, and by now nothing in it is new.
- R1: 6 sc in a magic ring (6)
- R2: inc in each stitch around (12)
- R3: (sc, inc) × 6 (18)
- R4: (2 sc, inc) × 6 (24)
- R5: (3 sc, inc) × 6 (30)
- R6: (4 sc, inc) × 6 (36)
- R7 to R11: sc in each stitch around, for 5 rounds (36)
Fit the eyes now, while the head is still open. Push the posts through between rounds 9 and 10, about 8 stitches apart. Hold the head at arm's length and check that the eyes are level. Then press the washers on from the inside until they click.
- R12: (4 sc, dec) × 6 (30)
- R13: (3 sc, dec) × 6 (24)
Stuff the head firmly, a little at a time.
- R14: (2 sc, dec) × 6 (18)
- R15: (sc, dec) × 6 (12)
- R16: dec × 6 (6)
Add a last pinch of stuffing before the hole gets too small. Fasten off, close the hole and hide the tail.
The face. With black thread, make a small U-shaped smile between rounds 10 and 11, centred between the eyes. With pink yarn, make one short sideways stitch under the outer corner of each eye. No safety eyes? Make 3 or 4 short vertical black stitches for each eye.
Sewing it together
Sewing is the part beginners worry about most. Two rules make it easy: pin everything first, and use the yarn tail that's already on the piece.
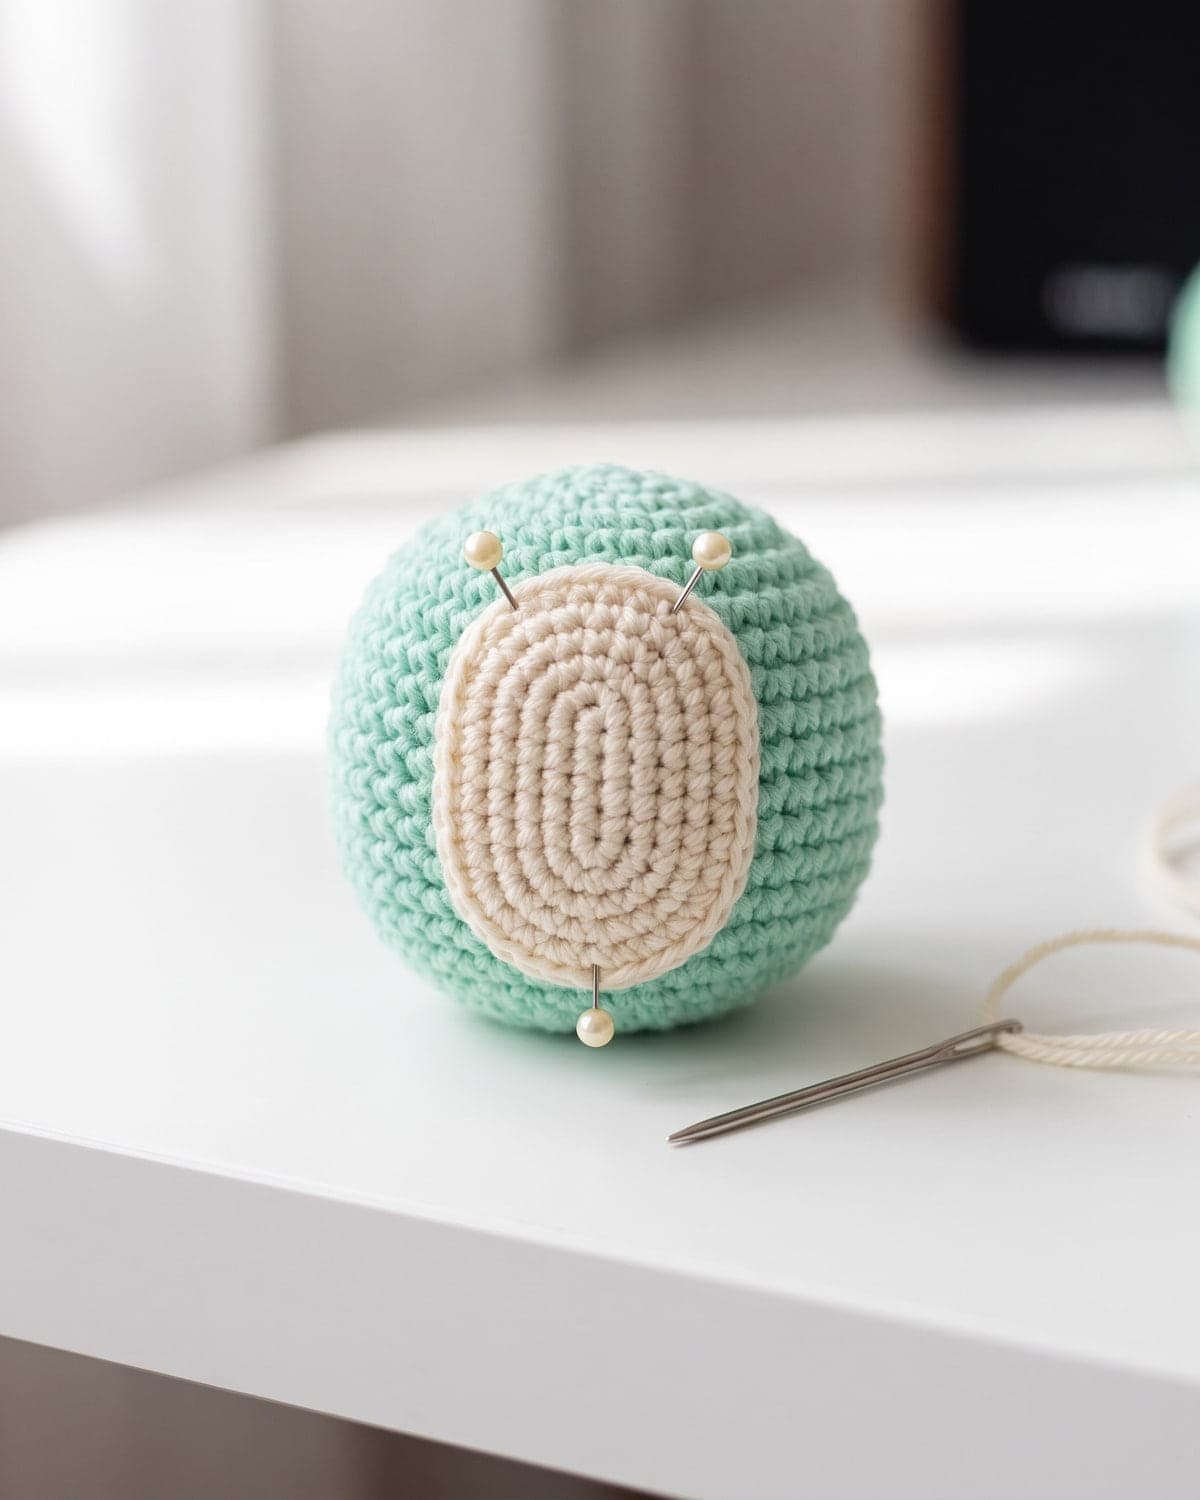
- Belly. Pull the cream circle gently from top to bottom to make an oval. Pin it to the front of the body, covering rounds 4 to 11. Sew around the edge. Bring the needle up through the body, catch one loop on the edge of the patch and go back down. Keep the stitches small.
- Shell. Pin the shell to the back. The top edge sits near rounds 9 to 11 of the body and the bottom edge near rounds 3 and 4. Sew around the rim. When you're halfway, slip a very thin layer of stuffing underneath.
 3. Head. Sit the head on top of the body. Sew around the top of the body in a circle, taking one small stitch from the head and one from the body each time. Go around twice. Before you close the last gap, push a little stuffing into the join so the neck is firm.
4. Arms. Pin one on each side of the body, around rounds 7 to 9, pointing slightly down and forwards. Sew along the flat edge.
5. Legs. Sew them low on the front, around rounds 3 to 5, about 7 to 9 stitches apart, turned slightly outwards.
6. Tail. Sew the wide end to the centre back, just under the shell.
Stand the turtle on the table. If it tips over, move the legs before you knot the last tails. To hide a tail, push the needle straight through the body, pull it out the other side and snip the yarn close to the surface. The end disappears inside.
Making the loop and adding the ring
 The loop holds the whole charm, so make it strong.
- Hold two strands of mint yarn together and treat them as one.
- Chain 14.
- Skip the first chain from the hook. Slip stitch into each of the other 13 chains. A slip stitch is the shortest stitch: insert the hook, yarn over, and pull through the chain and the loop on the hook in one move.
- Fasten off, leaving both tails long.
- Fold the cord in half to make a loop. Sew both ends to the very top of the head, over rounds 1 and 2. Stitch through several stitches around the crown, tie the tails together and hide them inside the head.
Open the split ring with a fingernail or pliers and thread it through the loop. For a bag, a lobster clasp on a short chain is easier to clip on and off. Pull hard on the ring. If anything moves, sew the loop again.
Make it yours
 Once you've made one, the second is much faster. Some easy changes:
- New colours. Pink with a rose shell, blue with a navy shell, or lilac with a purple shell. Keep the shell darker than the body.
- A set of gifts. Three turtles in different colours make a present for teachers, friends or classmates.
- A zip pull. Use a small lobster clasp and no ring.
- A car charm. Make the loop from 30 chains, with no metal ring.
- A bigger toy. Thicker yarn and a bigger hook give a bigger turtle with the same rounds.
Beginner mistakes and how to fix them
My circle has a hole in the middle. The magic ring wasn't pulled tight. Pull the tail firmly, then weave it around the centre once and knot it.
My stitch count is wrong. You probably worked into the stitch marker's stitch twice, or skipped it. Pull back to the marker and redo the round. It's quicker than hoping it works out.
I can see the stuffing. Your stitches are too loose. Hold the yarn a little tighter, or change to a 2.25 mm hook.
My piece is inside out. The outside should show neat little V shapes. If you see horizontal bars, push the piece through so it flips.
My decreases leave gaps. Check that you're going under the front loops only.
The head wobbles. The neck needs more stuffing, or more stitches. Sew around it once more.
The belly is round, not oval. Pin the top and bottom first while stretching it, then the sides.
The loop is stretching. Use two strands and sew through more of the crown, or replace it with a short length of cord.
Frequently asked questions
Can a complete beginner make this crochet bag charm? Yes, if you can chain and single crochet. The magic ring and the invisible decrease are the only new things, and the first pieces let you practise them.
How long does it take? About four to five hours for a first try. An experienced crocheter needs about three.
What's the easiest yarn for a first amigurumi? Smooth DK cotton in a light colour. You can see every stitch.
Do I really need a stitch marker? Yes. Without one you can't tell where a round ends. A paper clip or a scrap of yarn in another colour works too.
Can I use a bigger hook? You can, but the fabric will be looser and the stuffing may show. If you go up a hook size, use thicker yarn as well.
How do I clean the charm? Wipe it with a damp cloth and a little mild soap. Don't soak the metal ring. Let it dry flat, away from heat.
Can I sell the turtles I make? Yes, in small quantities, with your own photos. Please don't copy or resell the pattern itself.
What to make next
- For the same turtle as a compact pattern, with sizes and colour ideas, see the crochet turtle keychain.
- For a full lesson on shaping, stuffing and safety eyes, read amigurumi for beginners.
- For a first toy with almost no sewing, try the easy crochet octopus.
- To learn more stitches, go to easy crochet stitches for beginners.
More first projects are in the beginner tutorials section.
Save it for later
Pin this to your Pinterest board so it's there when you're ready to stitch.
Keep stitching
Related crochet projects
Amigurumi Crochet Turtle Keychain: Free Pattern for a Mini Amigurumi Turtle
13 min read
Amigurumi Crochet Turtle Pattern: Free and Easy Amigurumi for Beginners
11 min read
Clothing Easy Crochet Scarf for Beginners: One Stitch, Free Pattern
10 min read
Amigurumi Amigurumi for Beginners: How to Crochet Your First Animal
10 min read