How to Change Colors in Crochet: Easy Step-by-Step Guide
Learn how to change colors in crochet the clean way: finish the last stitch with the new colour. Step-by-step for stripes, joined rounds, spirals and mid-row changes, plus carrying yarn, standing stitches and weaving in ends.
By AlixaPublished 12 min read

Learning how to change colours in crochet opens up almost every project you'll want to make next: striped scarves, granny squares, colourful amigurumi, temperature blankets and pictures worked in yarn. The good news is that there's really only one trick to learn. You finish the last stitch in the old colour with the new colour, and the change looks clean every time.
This guide shows you that basic method step by step, then how to use it at the end of a row, in the middle of a row, in joined rounds and in a spiral. It also covers carrying yarn up the side, standing stitches, joining yarn without knots, weaving in ends neatly, and a small striped practice swatch so you can try each technique.
Terms used here: US crochet terms. Single crochet (sc) is called double crochet (dc) in UK terms, half double crochet (hdc) is UK half treble, and double crochet (dc) is UK treble.
At a glance
| Skill level | Beginner (you can chain and work single crochet in rows) |
| You'll learn | The basic colour change, stripes, mid-row changes, rounds, spirals |
| Practice yarn | Worsted (weight 4) acrylic or cotton in two or three colours |
| Hook | 5 mm (US H-8) |
| Practice piece | A striped swatch about 14 × 14 cm (5.5 × 5.5 in) |
| Time | About an hour for the swatch and every technique |
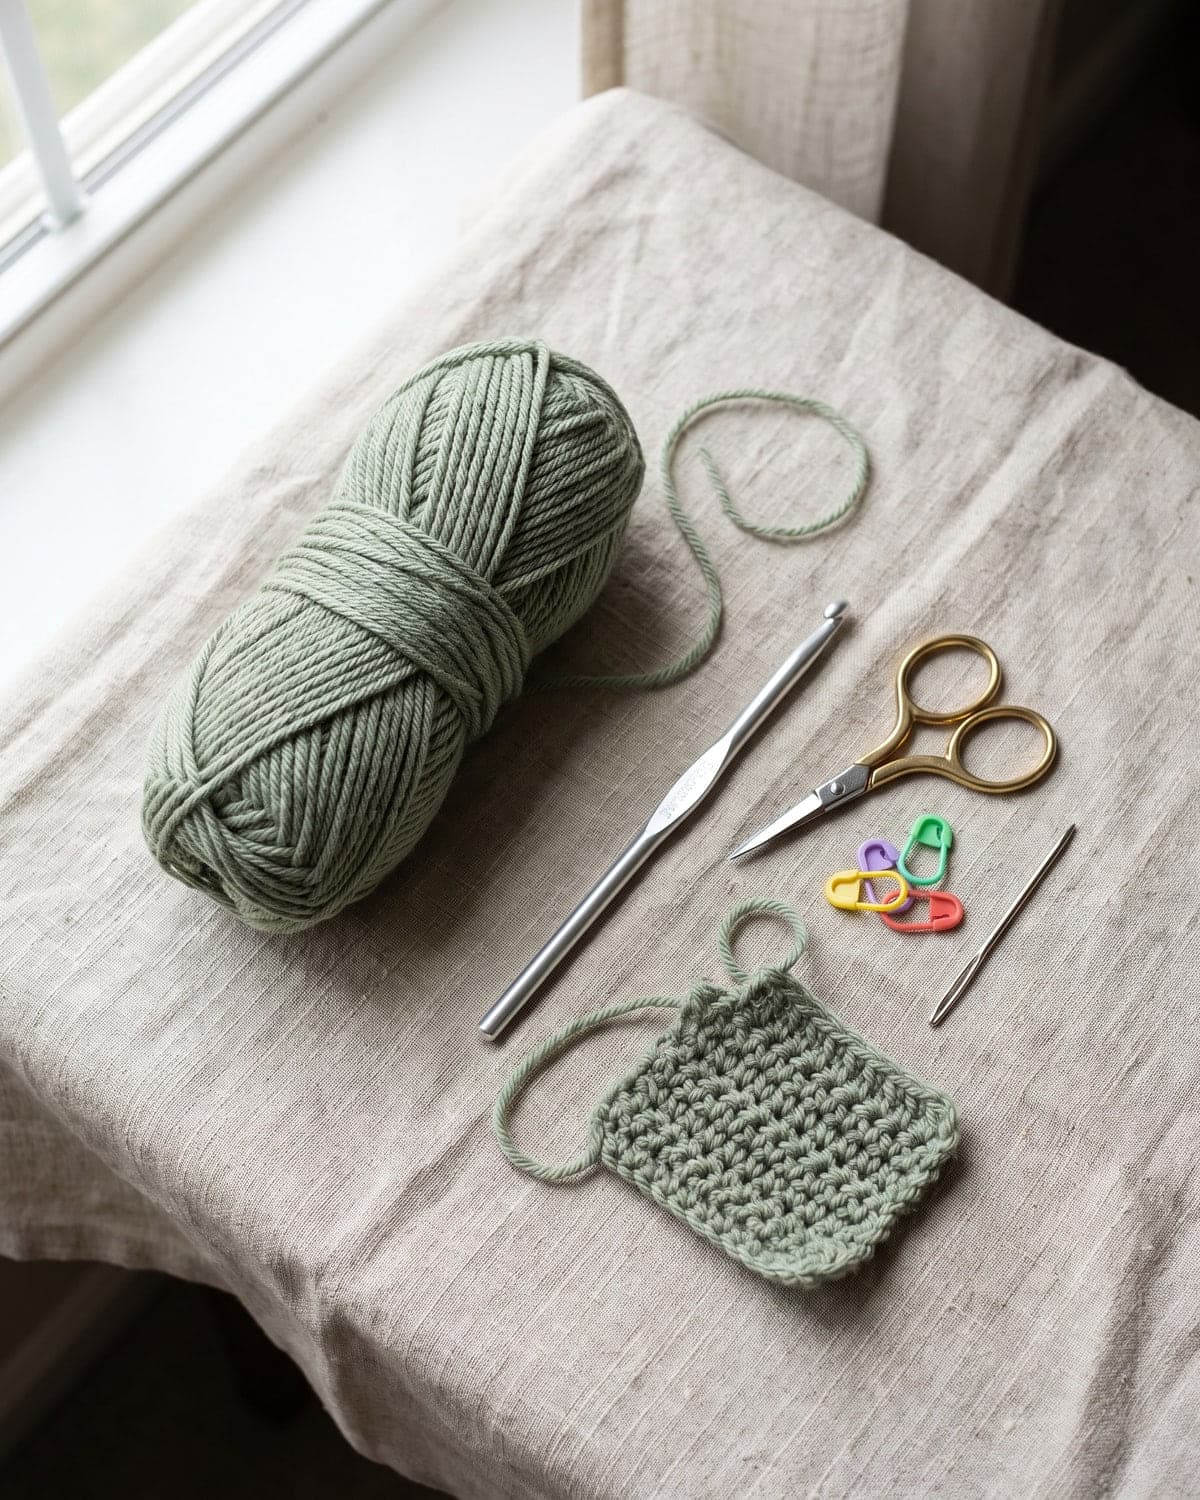
What you need

- Yarn in at least two colours. Use the same weight and fibre for every colour in a project, so the stitches stay the same size. For practice, choose a light and a dark colour so you can see exactly where each change happens.
- A hook that suits your yarn. For worsted weight, a 5 mm (US H-8) hook is a good start.
- A tapestry needle with an eye big enough for your yarn.
- Scissors.
- Stitch markers (optional) to mark the start of rounds.
Not sure what the numbers on your yarn label mean? The Craft Yarn Council's yarn weight chart explains the weights from lace to jumbo and the hook sizes that suit each one.
Why the colour changes one step early
Every crochet stitch ends with a loop on your hook. That loop becomes the top of the next stitch. So if you finish a stitch in red and then start the next stitch in blue, the first blue stitch has a red top, and the change looks like a little red blip.
The fix is simple: change colours during the last yarn over of the stitch before. The loop left on the hook is then the new colour, and the next stitch is the new colour from the very top. This works for every stitch, from slip stitch to treble crochet.
The basic colour change, step by step
Here is the method for single crochet. Every other stitch works the same way: only the final yarn over is different.
- Start the last stitch in the old colour. Insert your hook, yarn over and pull up a loop. You now have two loops on the hook.
- Drop the old colour. Let it hang at the back of your work.
- Pick up the new colour. Leave a tail of about 15 cm (6 in). Hold the tail against the back of the work with your other hand.
- Finish the stitch with the new colour. Yarn over with the new colour and pull it through both loops.
- Carry on. Your next stitch is entirely in the new colour. Give both tails a gentle tug to tighten the first stitch.
 For double crochet: yarn over, insert the hook, pull up a loop, yarn over and pull through 2 loops in the old colour. Then pull the new colour through the last 2 loops.
For half double crochet: yarn over, insert the hook, pull up a loop in the old colour. You have 3 loops. Pull the new colour through all 3.
For slip stitch: insert the hook, then pull the new colour through the stitch and the loop on your hook in one go.
Changing colour at the end of a row: stripes
Stripes are the easiest way to practise. Change colour in the last stitch of a row, then turn and chain with the new colour.
- Work to the last stitch of the row.
- Make the last stitch with the colour change described above.
- Turn your work and make the turning chain with the new colour.
- Cut the old colour, leaving a 15 cm (6 in) tail, or carry it up the side (see below).
Practice swatch: two-row stripes
Use two colours, A and B, and a 5 mm hook.
- Foundation: with A, chain 21.
- Row 1: sc in the 2nd chain from the hook and in each chain across. (20 sc)
- Row 2: ch 1, turn. Sc in each stitch across, changing to B in the last stitch. (20 sc)
- Rows 3 and 4: with B, ch 1, turn, sc in each stitch across. Change to A in the last stitch of row 4. (20 sc)
- Rows 5 and 6: with A, as rows 3 and 4, changing to B at the end of row 6.
Repeat until the swatch is square, about 18 rows. Fasten off.
Because each stripe has an even number of rows, the colour you need is always waiting at the same edge, so you can carry it instead of cutting it.
Carrying yarn up the side
When your stripes have an even number of rows, you don't need to cut the yarn after every stripe. Leave the unused colour hanging at the edge, and pick it up again when it's needed.
- Short gaps (2 to 4 rows): just leave the yarn hanging and pick it up. Don't pull it tight, or the edge will pucker.
- Longer gaps: every couple of rows, twist the working yarn and the waiting yarn around each other once at the edge. This catches the waiting yarn neatly against the side.
- Hide it under a border. The carried strands look like a little ladder along one edge. A round of single crochet around the finished piece covers them completely.
Carrying yarn saves you dozens of ends to weave in on a blanket. For stripes with an odd number of rows, the yarn ends up at the wrong edge, so you'll need to cut it, or work the next row from the other side with a standing stitch.
Standing stitches: joining without a slip stitch
A standing stitch lets you start a new colour anywhere, without making a slip stitch and chains first. It's neater, and it's the best way to start a new colour at the beginning of a row or round.
Standing single crochet: make a slip knot in the new colour and put it on your hook. Insert the hook into the stitch, yarn over, pull up a loop, yarn over and pull through both loops.
Standing double crochet: make a slip knot on your hook, then yarn over and hold both loops with your finger. Insert the hook into the stitch and finish the double crochet as usual.
The slip knot will be hidden inside the stitch. Weave its tail in on the back.
Changing colour in joined rounds
Granny squares, coasters and many hats are worked in joined rounds: each round ends with a slip stitch into the first stitch.
- To change colour at the join, work the joining slip stitch with the new colour: insert the hook into the first stitch, drop the old colour and pull the new colour through. Make your starting chain with the new colour.
- Or fasten off and rejoin. Cut the old colour, then join the new one in a different place with a standing stitch. Joining in a different spot each round stops a visible seam building up. This is how the crochet flower granny square is worked.
For more on granny squares, see how to crochet a granny square.
Changing colour in a spiral (amigurumi)
 Amigurumi is usually worked in a continuous spiral. Each round sits a little higher than the last, so a colour change leaves a small step called a jog.
- Change colour in the last stitch of the round, as usual.
- Work the first stitch of the new round as a slip stitch. It's shorter, so it lowers the step.
- Carry on in single crochet, and when you come back around, work into the slip stitch as if it were a normal stitch.
The jog almost disappears. Put it at the back of the toy, where nobody looks. If your toy has several colours, a stitch marker at the start of the round helps you change in the same place every time. The amigurumi for beginners guide explains working in a spiral in more detail.
Changing colour in the middle of a row
For pictures, letters and patterns like hearts or checks, you'll change colour within a row. There are two main ways.
Tapestry crochet: carrying the yarn inside
Both colours travel along the row. You crochet over the colour you're not using, so it's hidden inside your stitches.
- Lay the unused colour along the top of the row you're working into.
- Work each stitch around it. It disappears inside the stitch.
- When you need it, change colour on the last yarn over of the stitch before, and carry the other colour instead.
Tapestry crochet gives a firm, double-thick fabric that's perfect for bags, baskets and coasters. Single crochet hides the carried yarn best. Wikipedia's article on tapestry crochet shows how this technique has been used around the world.

Intarsia: a separate ball for each block
For large blocks of colour, such as a big heart on a blanket, carrying yarn makes the fabric too thick. Instead, use a separate small ball or bobbin for each area of colour. At each colour change, drop the old colour on the wrong side and pick up the new one. The yarns don't travel, so the fabric stays soft.
Wind small amounts onto bobbins or clothes pegs so they don't tangle. Twist the two colours around each other once at each change on the wrong side to avoid a hole.
Corner-to-corner blankets use a similar idea with small square tiles. See the corner to corner crochet blanket guide.
Joining yarn without knots
Sometimes you run out of yarn in the middle of a row. You can use the colour change method above, and simply "change" to the same colour. Or try one of these:
- Russian join. Thread one end onto a needle and weave it back into its own strand for 5 cm (2 in), through the loop of the other end. Repeat with the other end. The two ends lock together with no ends to weave in. It works best with wool and acrylic plies.
- Spit splice. For 100% wool that isn't superwash, overlap the ends, dampen them and rub them between your palms. The fibres felt together.
- Avoid plain knots. Knots can work loose and poke through to the front. If you must tie a knot, weave in the ends as well.
How to weave in ends neatly
 Every colour change leaves two tails. Good weaving keeps them from popping out after washing.
- Leave long tails, at least 15 cm (6 in), so they're easy to thread.
- Weave into the same colour. Thread a red tail through red stitches, so it doesn't show on the front.
- Change direction. Weave about 5 cm in one direction, then turn and weave back for 2 or 3 cm. The change of direction locks the tail in place.
- Split the plies of a few stitches as you go, for extra grip.
- Trim close, then stretch the fabric gently so the end slips inside.
Save time by crocheting over the ends. When you start a new colour, lay both tails along the top of the row and work your next 8 to 10 stitches over them. Then trim. This is the best trick for granny squares and stripes.
Planning colours for a project
- Contrast matters. Colours with similar lightness blur together from a distance. Take a black and white photo of your yarns: if two look the same grey, they'll look soft and blended.
- Use an odd number of colours in stripes for a less predictable, more natural look.
- Buy enough of each colour in one dye lot, especially the main colour.
- Keep the same fibre. Mixing cotton and acrylic in one project can make it pucker after washing.
The crochet temperature blanket is a great colour-planning project, with one colour for each temperature range.
Common problems and fixes
The first stitch of the new colour has an old-colour top. You changed colour after finishing the stitch, not during its last yarn over. Change one step earlier.
There's a gap or a loose stitch at the colour change. Pull both tails gently to tighten it, then weave them in across the gap.
The edge puckers where I carried yarn. The carried strand is too tight. Leave it slightly loose and spread the work out before twisting.
The carried colour shows through in tapestry crochet. Use single crochet and a slightly smaller hook, and keep the carried strand on top of the stitches, not behind them.
My stripes look jagged in the round. That's the spiral jog. Use the slip stitch trick above, or work in joined rounds.
The ends keep poking out. Weave them further, change direction and split the plies.
Frequently asked questions
Do I cut the yarn every time I change colour? No. In stripes with an even number of rows you can carry it up the side. In tapestry crochet you carry it along the row. You only need to cut when the yarn won't be used again for a while.
Where should I change colour, at the end of a row or the start of the next? At the end: in the last stitch of the row before the new colour starts.
Can I change colour with a slip stitch? Yes. In joined rounds, the joining slip stitch is a good place to bring in the new colour.
How do I avoid weaving in so many ends? Carry yarn up the side, crochet over the tails as you go, or use a Russian join.
Does the method work for UK terms too? Yes. Only the names of the stitches change; the colour change is the same.
What to practise next
- If you're new to crochet, start with how to crochet for beginners.
- For a flat round to try spiral changes on, see how to crochet a circle.
- For stripes in a big project, try the easy ripple crochet blanket.
- For colourful rounds, make a granny square.
There are more step-by-step lessons in the beginner tutorials section.
Save it for later
Pin this to your Pinterest board so it's there when you're ready to stitch.

Keep stitching
Related crochet projects
Beginner tutorials How to Crochet a Granny Square: Easy Step-by-Step for Beginners
12 min read
Beginner tutorials How to Read Crochet Patterns: A Beginner's Guide
12 min read
Beginner tutorials How to Crochet for Beginners: A Step-by-Step Guide
11 min read
Beginner tutorials How to Crochet a Circle: Flat Circles in Any Stitch
10 min read